> ## Documentation Index
> Fetch the complete documentation index at: https://guide.cloudsania.com/llms.txt
> Use this file to discover all available pages before exploring further.
# How to Set Up AWS Connector
> Step-by-step guide to setting up AWS cloud connector in Cloudsania
## Overview
This guide walks you through setting up an AWS connector in Cloudsania, enabling you to manage your AWS resources efficiently.
**Prerequisites**
1. You have an active [AWS account](https://aws.amazon.com/)
2. You have the necessary permission to create IAM users.
## **Setting Up AWS Cloud Connectors**
#### Video Tutorial: Setting Up AWS Default Access Connector
1. On the side navbar, click on "Cloud Connnector".
2. Click on "New Connector" button on the Cloud Connector Page.
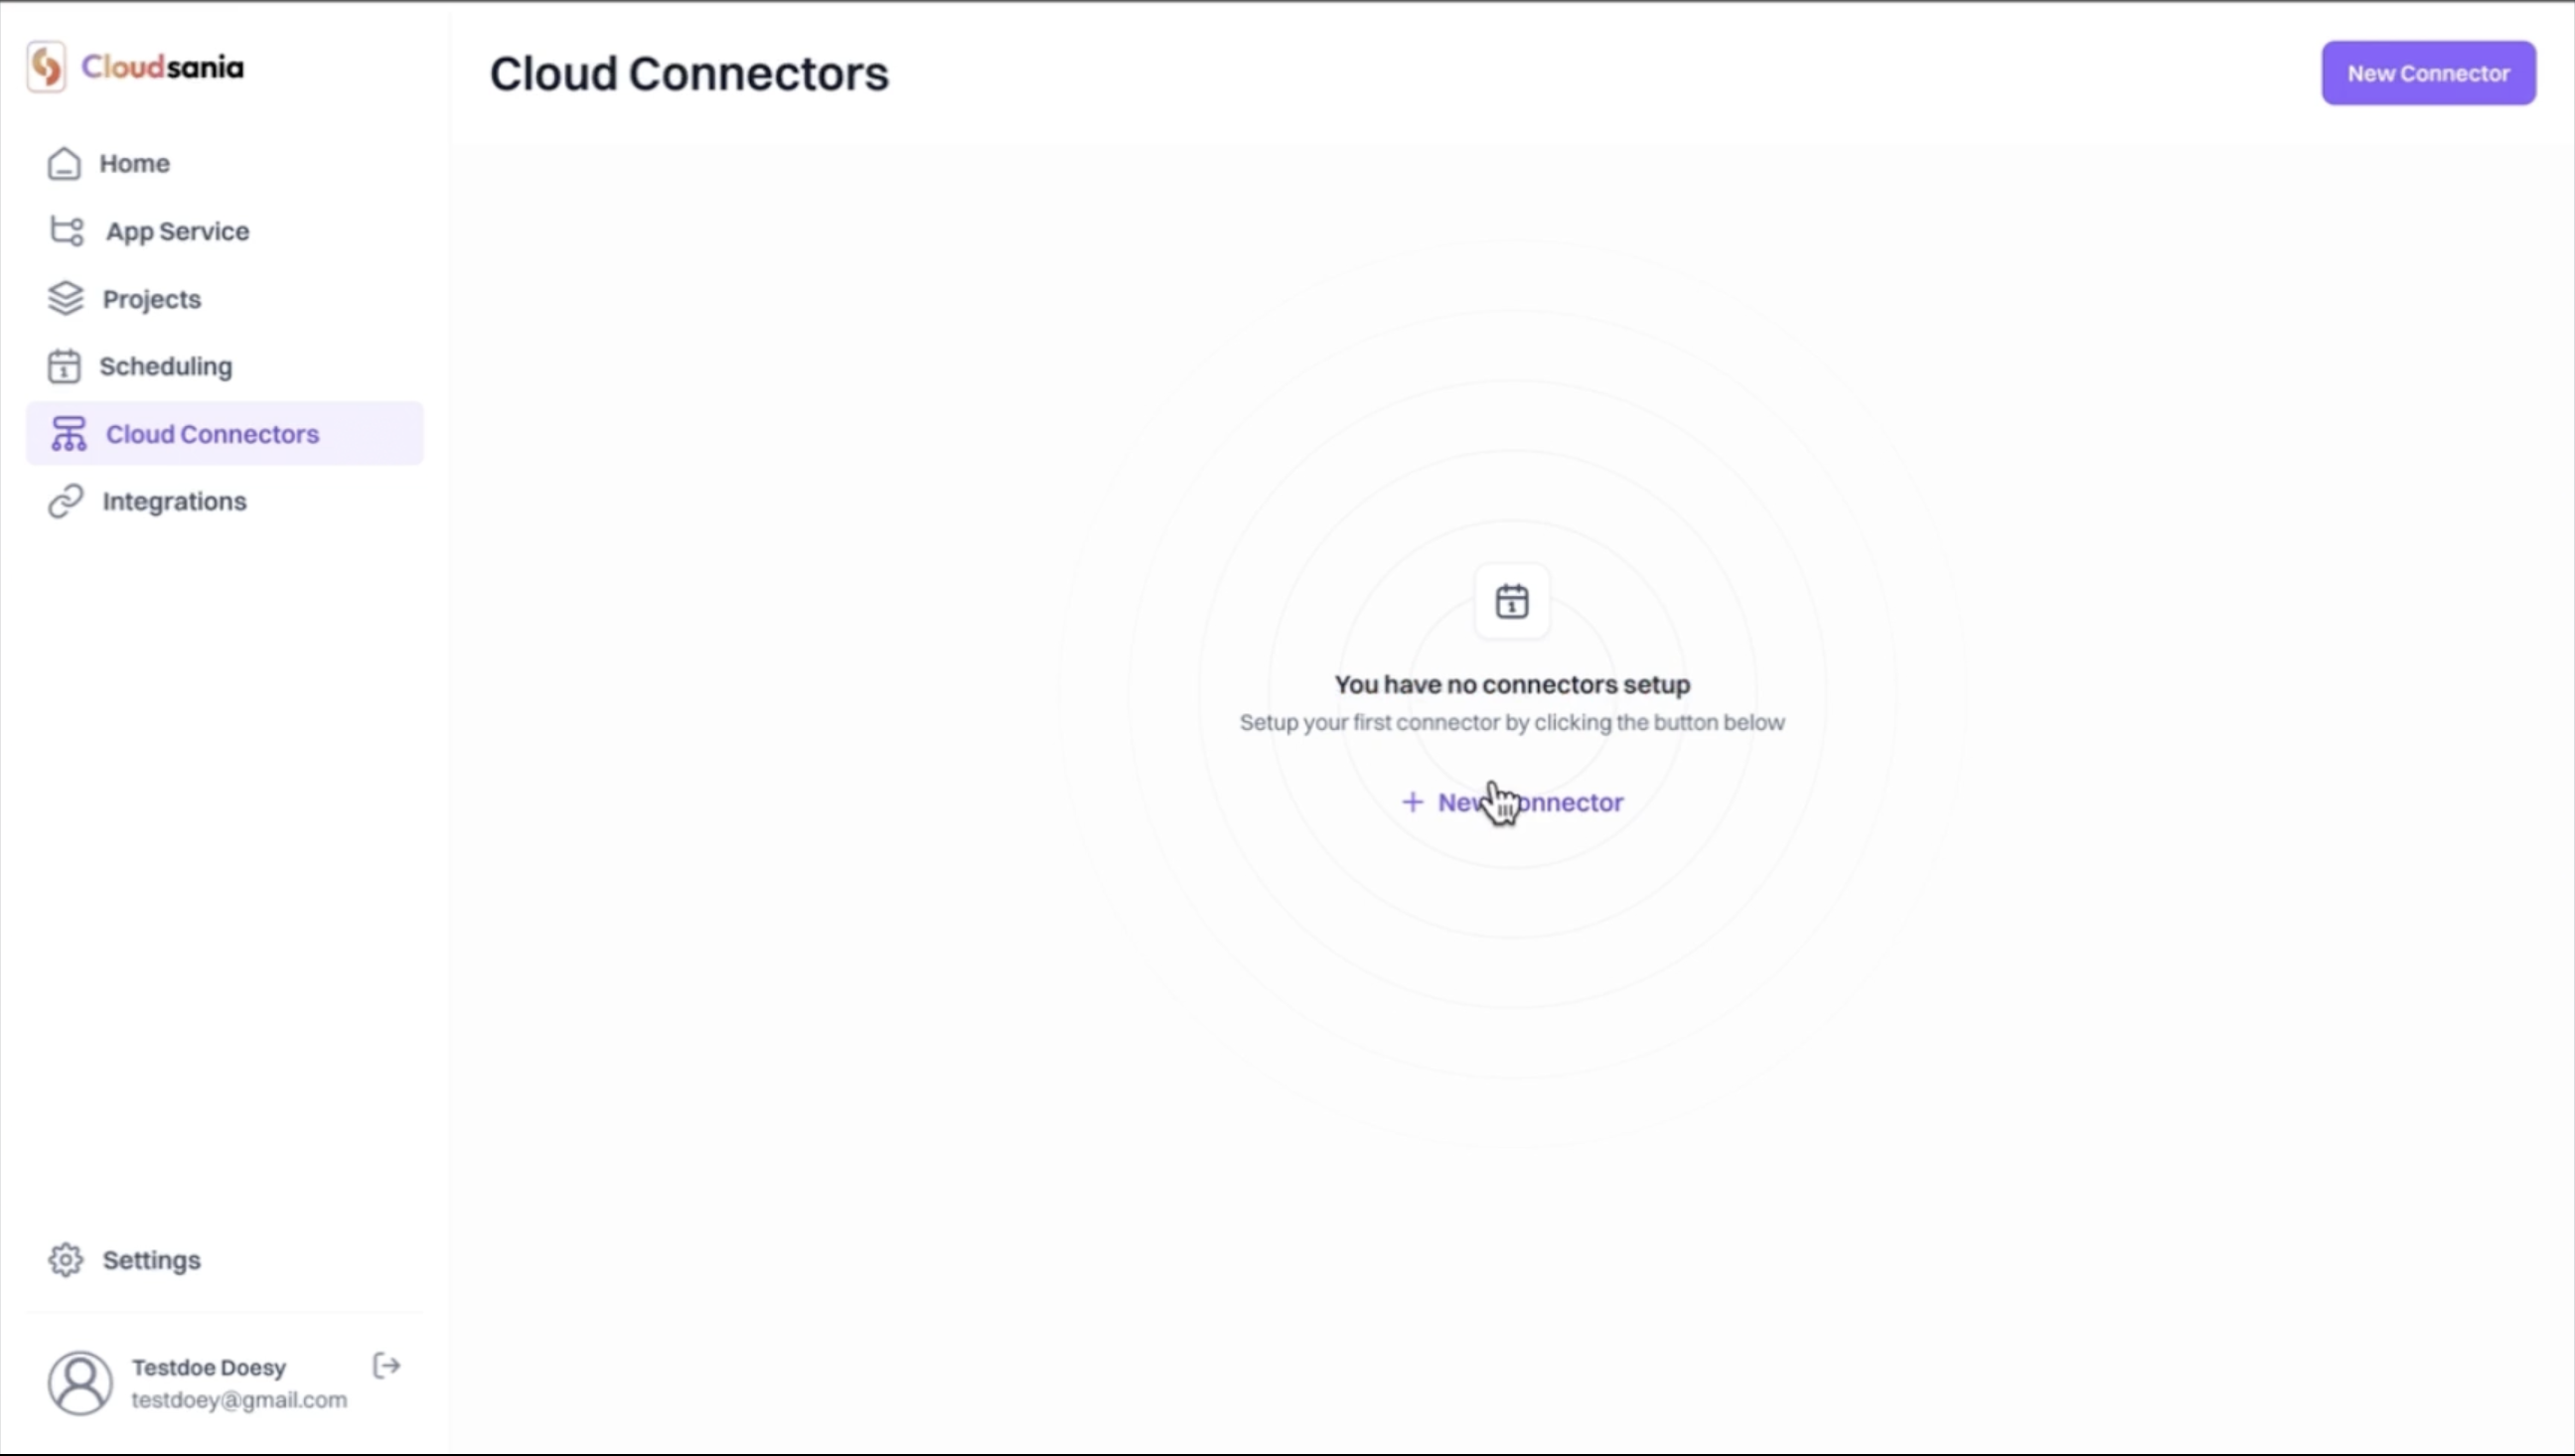 3. Select the "AWS" option from the list of cloud providers displayed and click on the "Confirm" button.
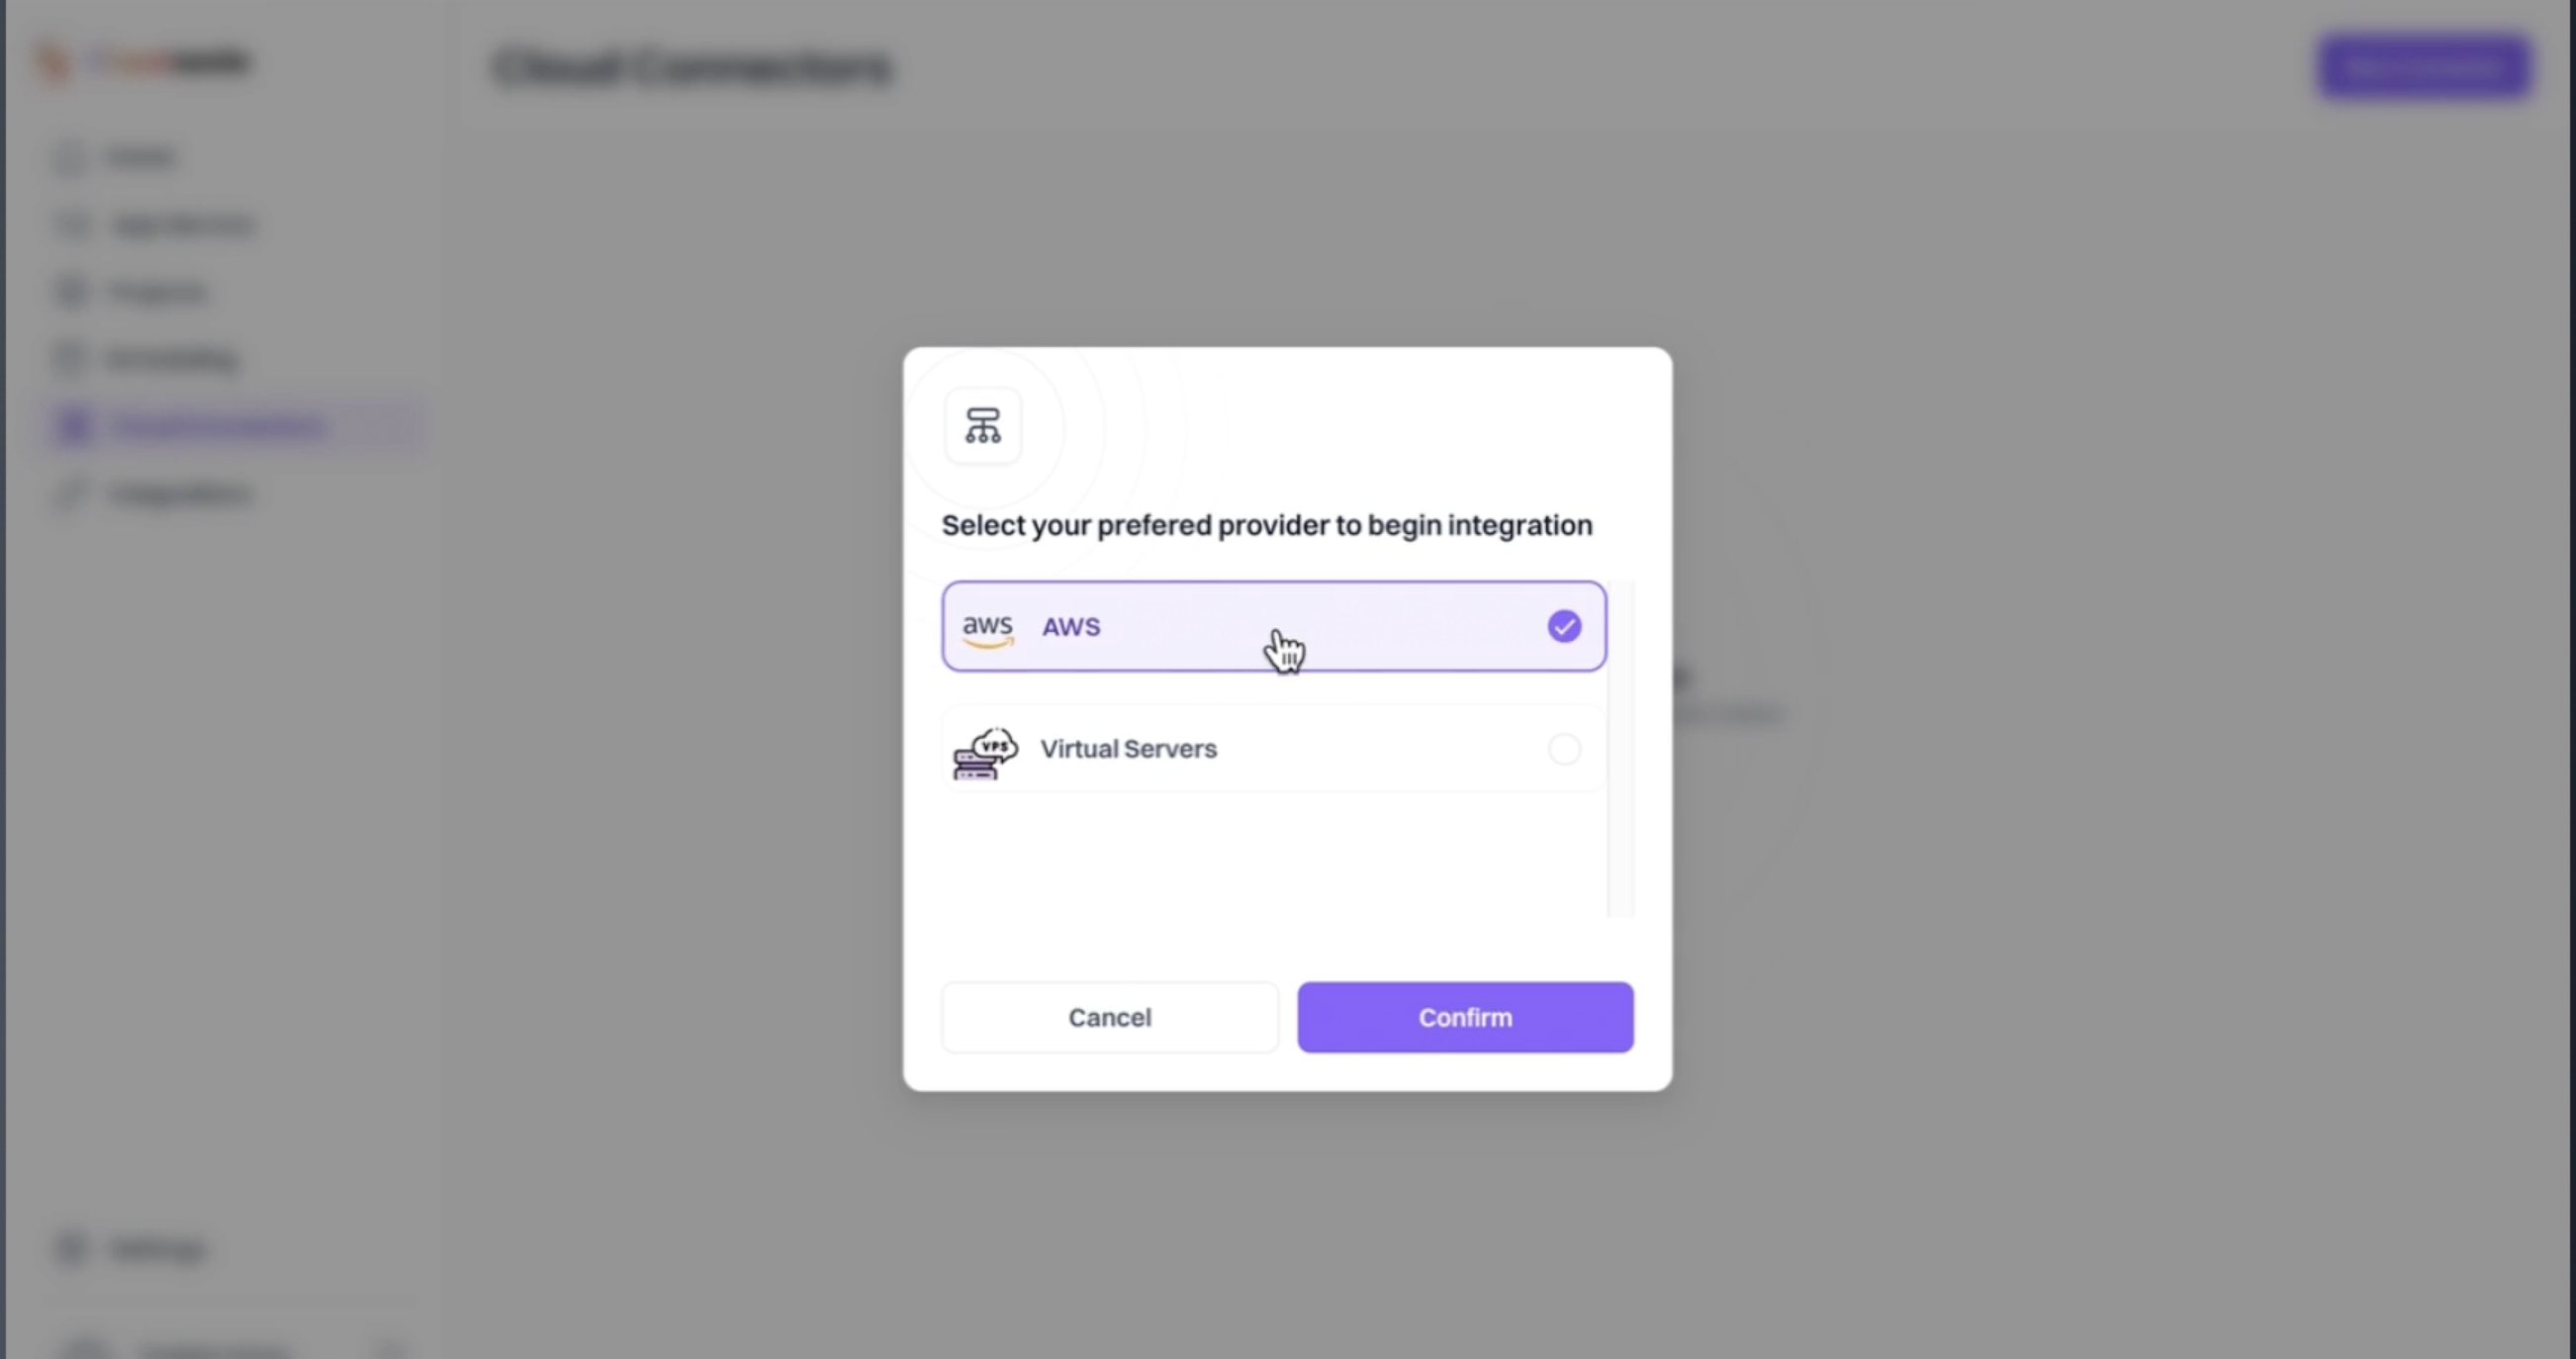 4. Provide Your Connector Details.
* Enter Your Connector Name.
* Select your AWS Regions. You'll get a dropdown to choose your desired AWS Regions.
4. Provide Your Connector Details.
* Enter Your Connector Name.
* Select your AWS Regions. You'll get a dropdown to choose your desired AWS Regions.
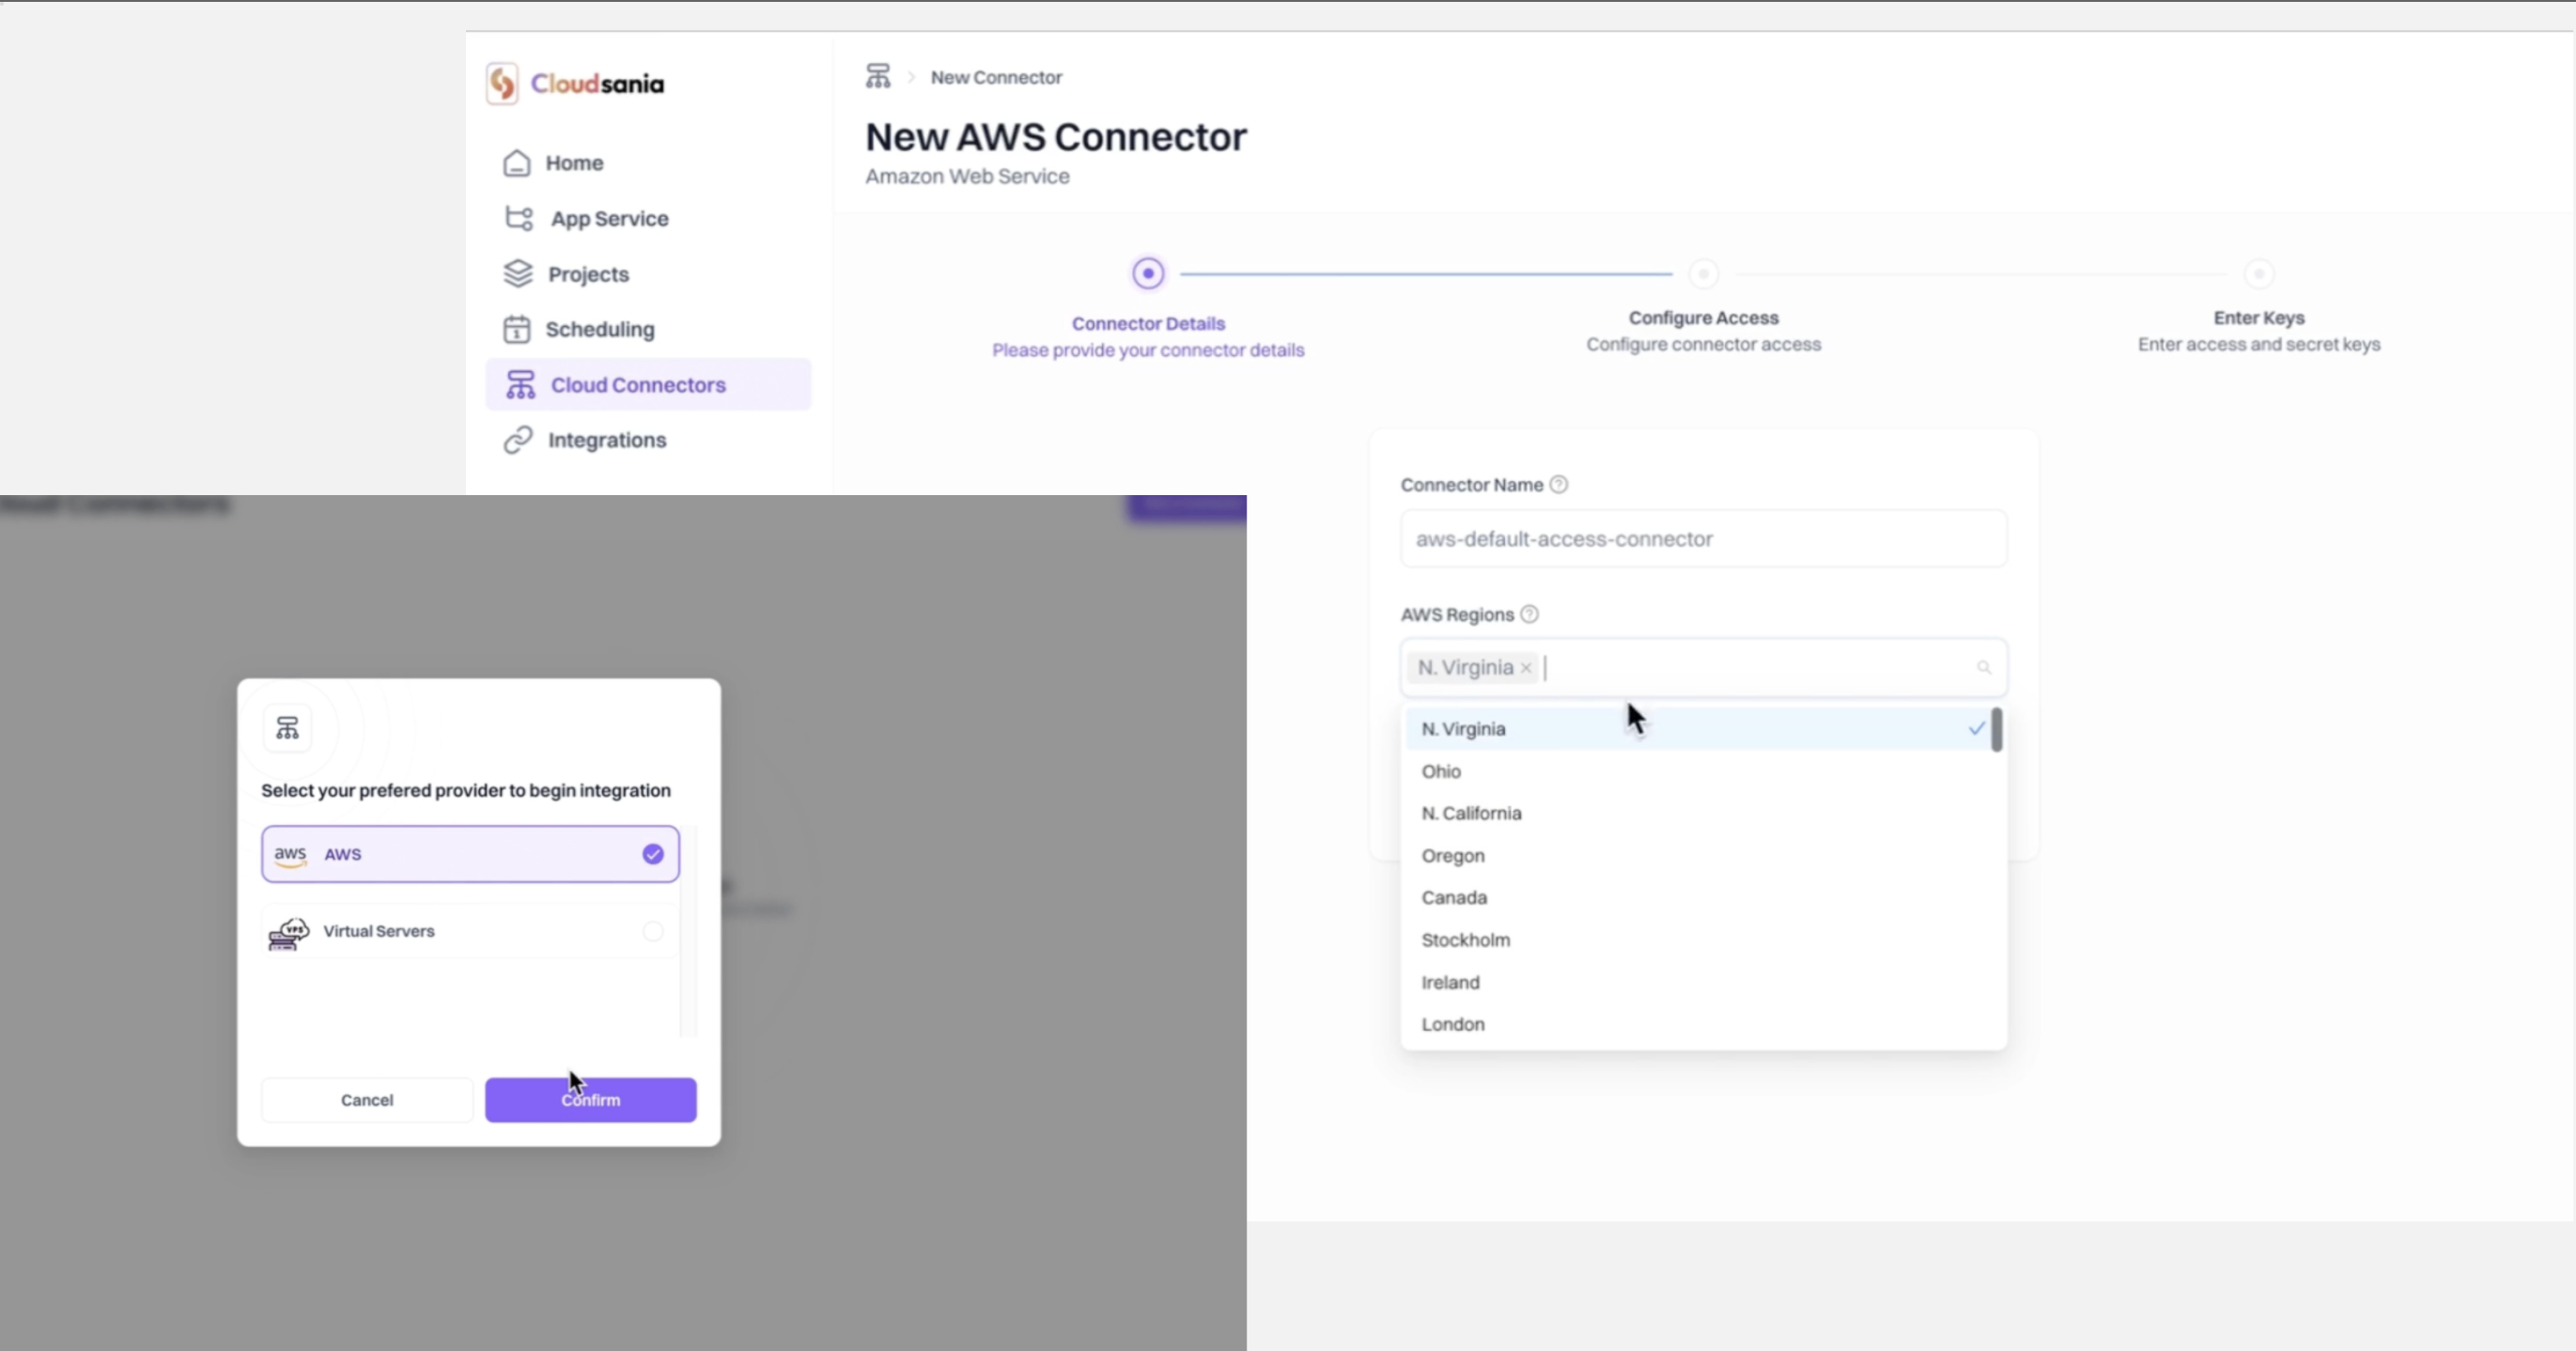 5. Configure Your Connector Access. Choose your preferred [AWS Connector access](/cloud-connectors/aws-connector#aws-connector-access-type) type.
6. Configure Your Connector for "Default Access".
* Click the "CloudFormation Launch template" link for easy setup with [Cloudsania default access policy](/cloud-connectors/aws-connector#required-aws-permissions).
* This will open a new tab and redirect you to AWS CloudFormation page.
5. Configure Your Connector Access. Choose your preferred [AWS Connector access](/cloud-connectors/aws-connector#aws-connector-access-type) type.
6. Configure Your Connector for "Default Access".
* Click the "CloudFormation Launch template" link for easy setup with [Cloudsania default access policy](/cloud-connectors/aws-connector#required-aws-permissions).
* This will open a new tab and redirect you to AWS CloudFormation page.
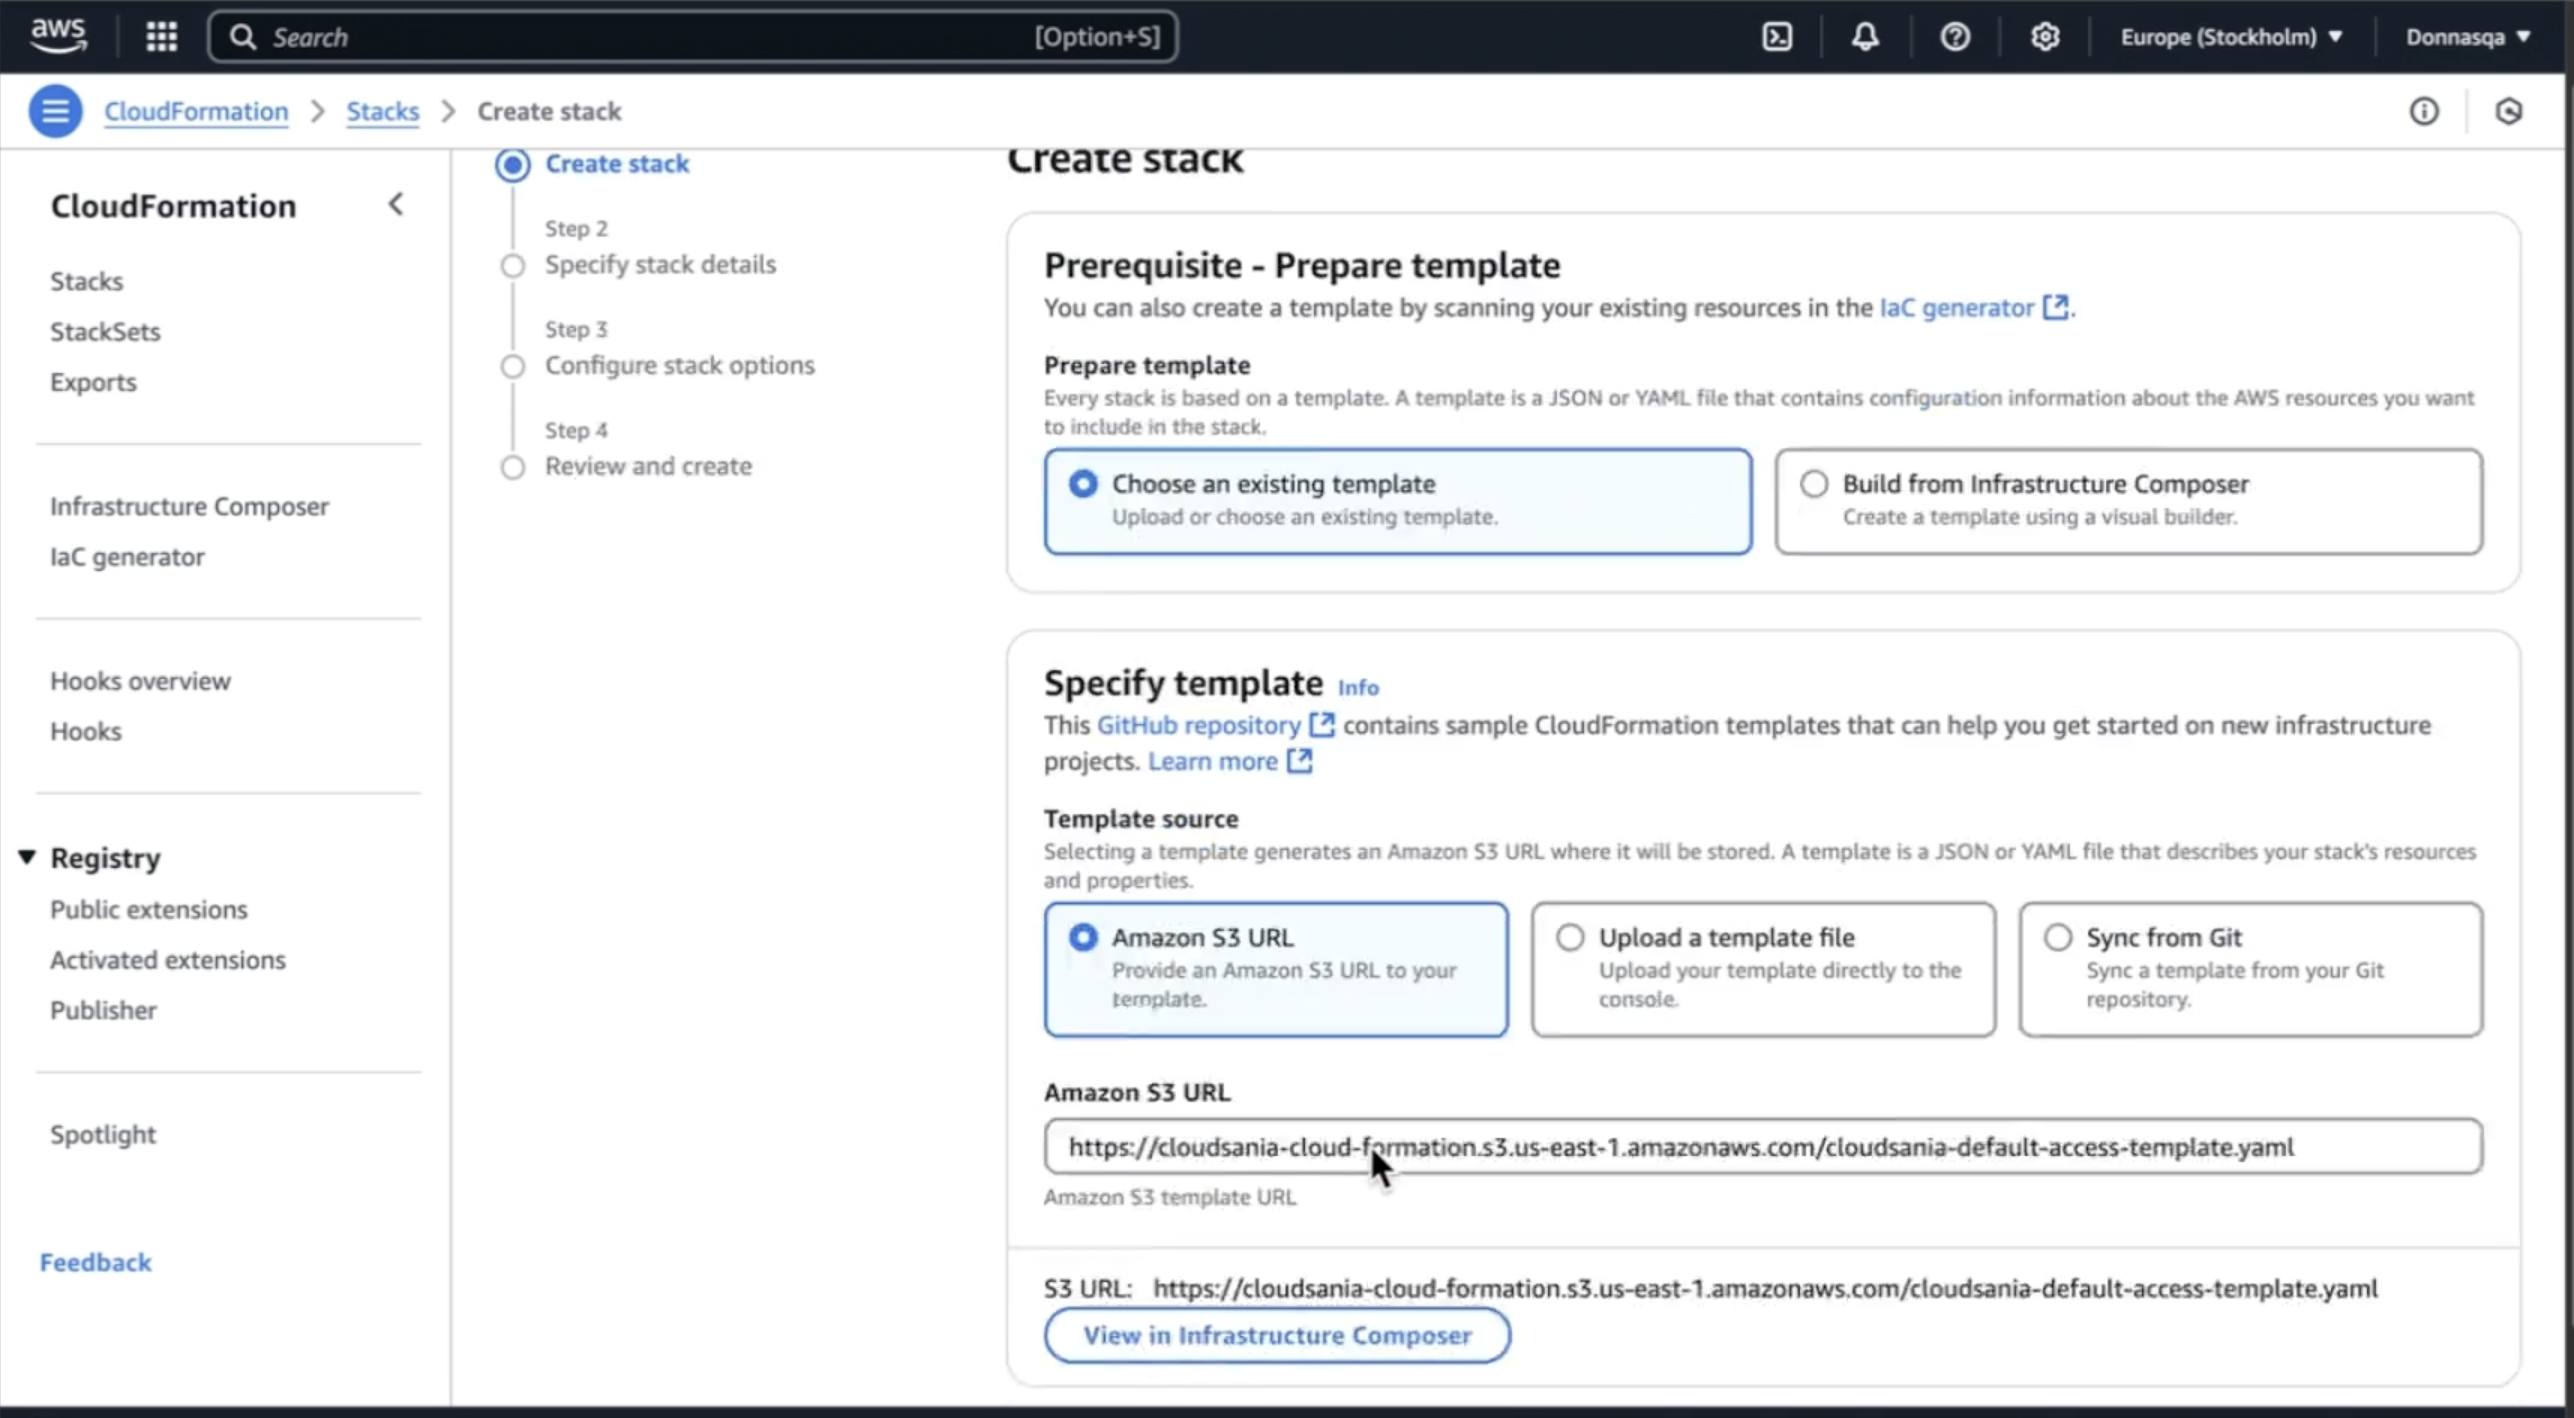
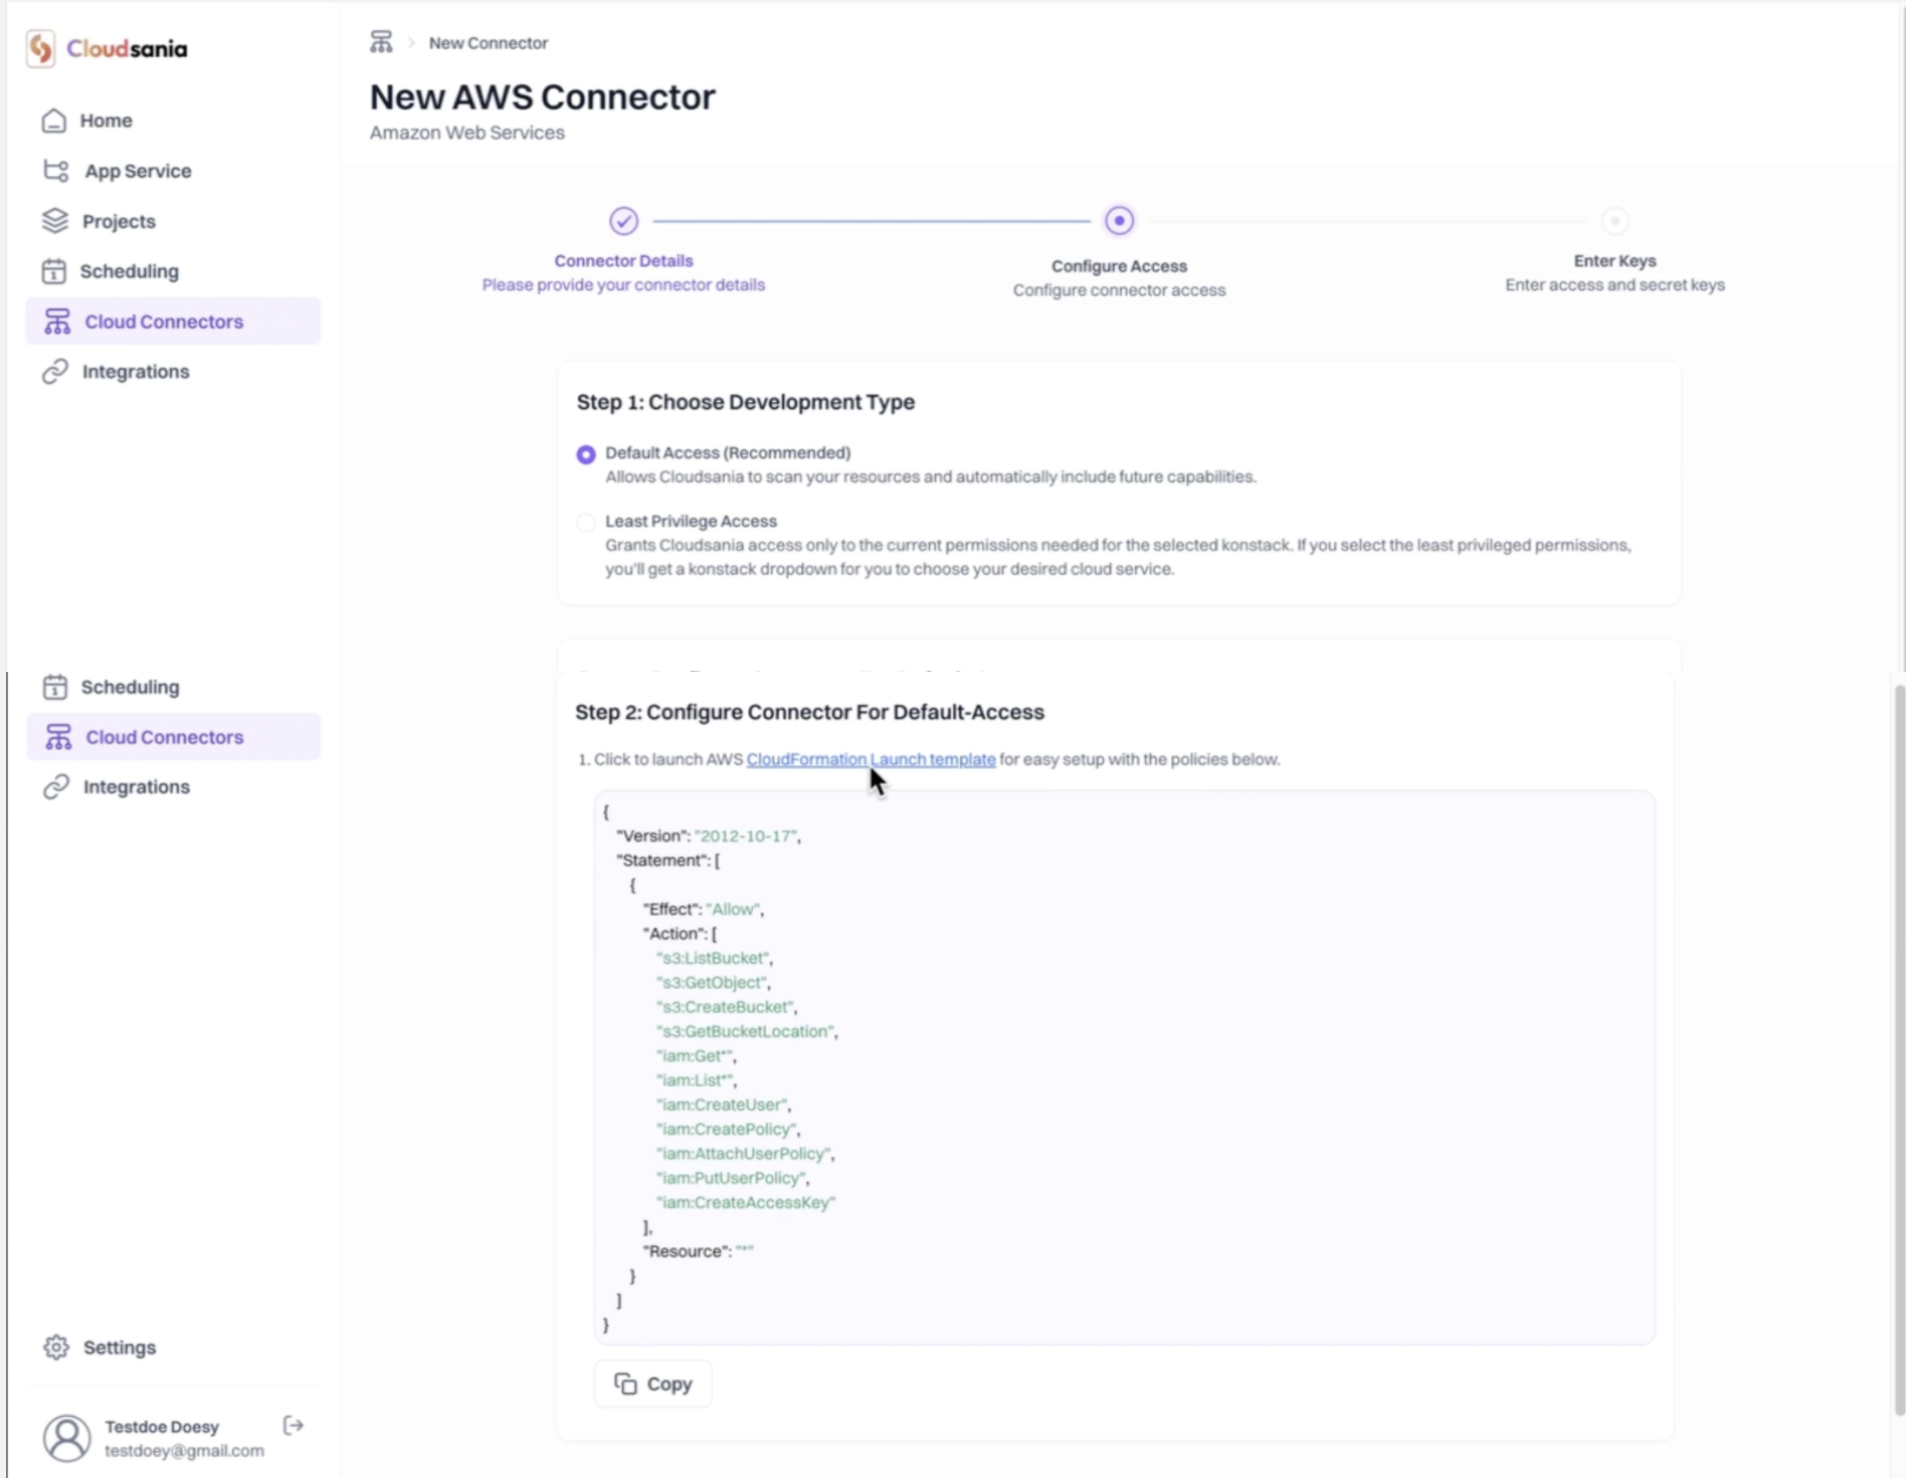 7. Proceed to create a CloudFormation Stack.
* The Template (Choose an existing template) and "Template source"(Amazon S3 URL) will be preselected for you
* Simply click "Next" to proceed.
7. Proceed to create a CloudFormation Stack.
* The Template (Choose an existing template) and "Template source"(Amazon S3 URL) will be preselected for you
* Simply click "Next" to proceed.
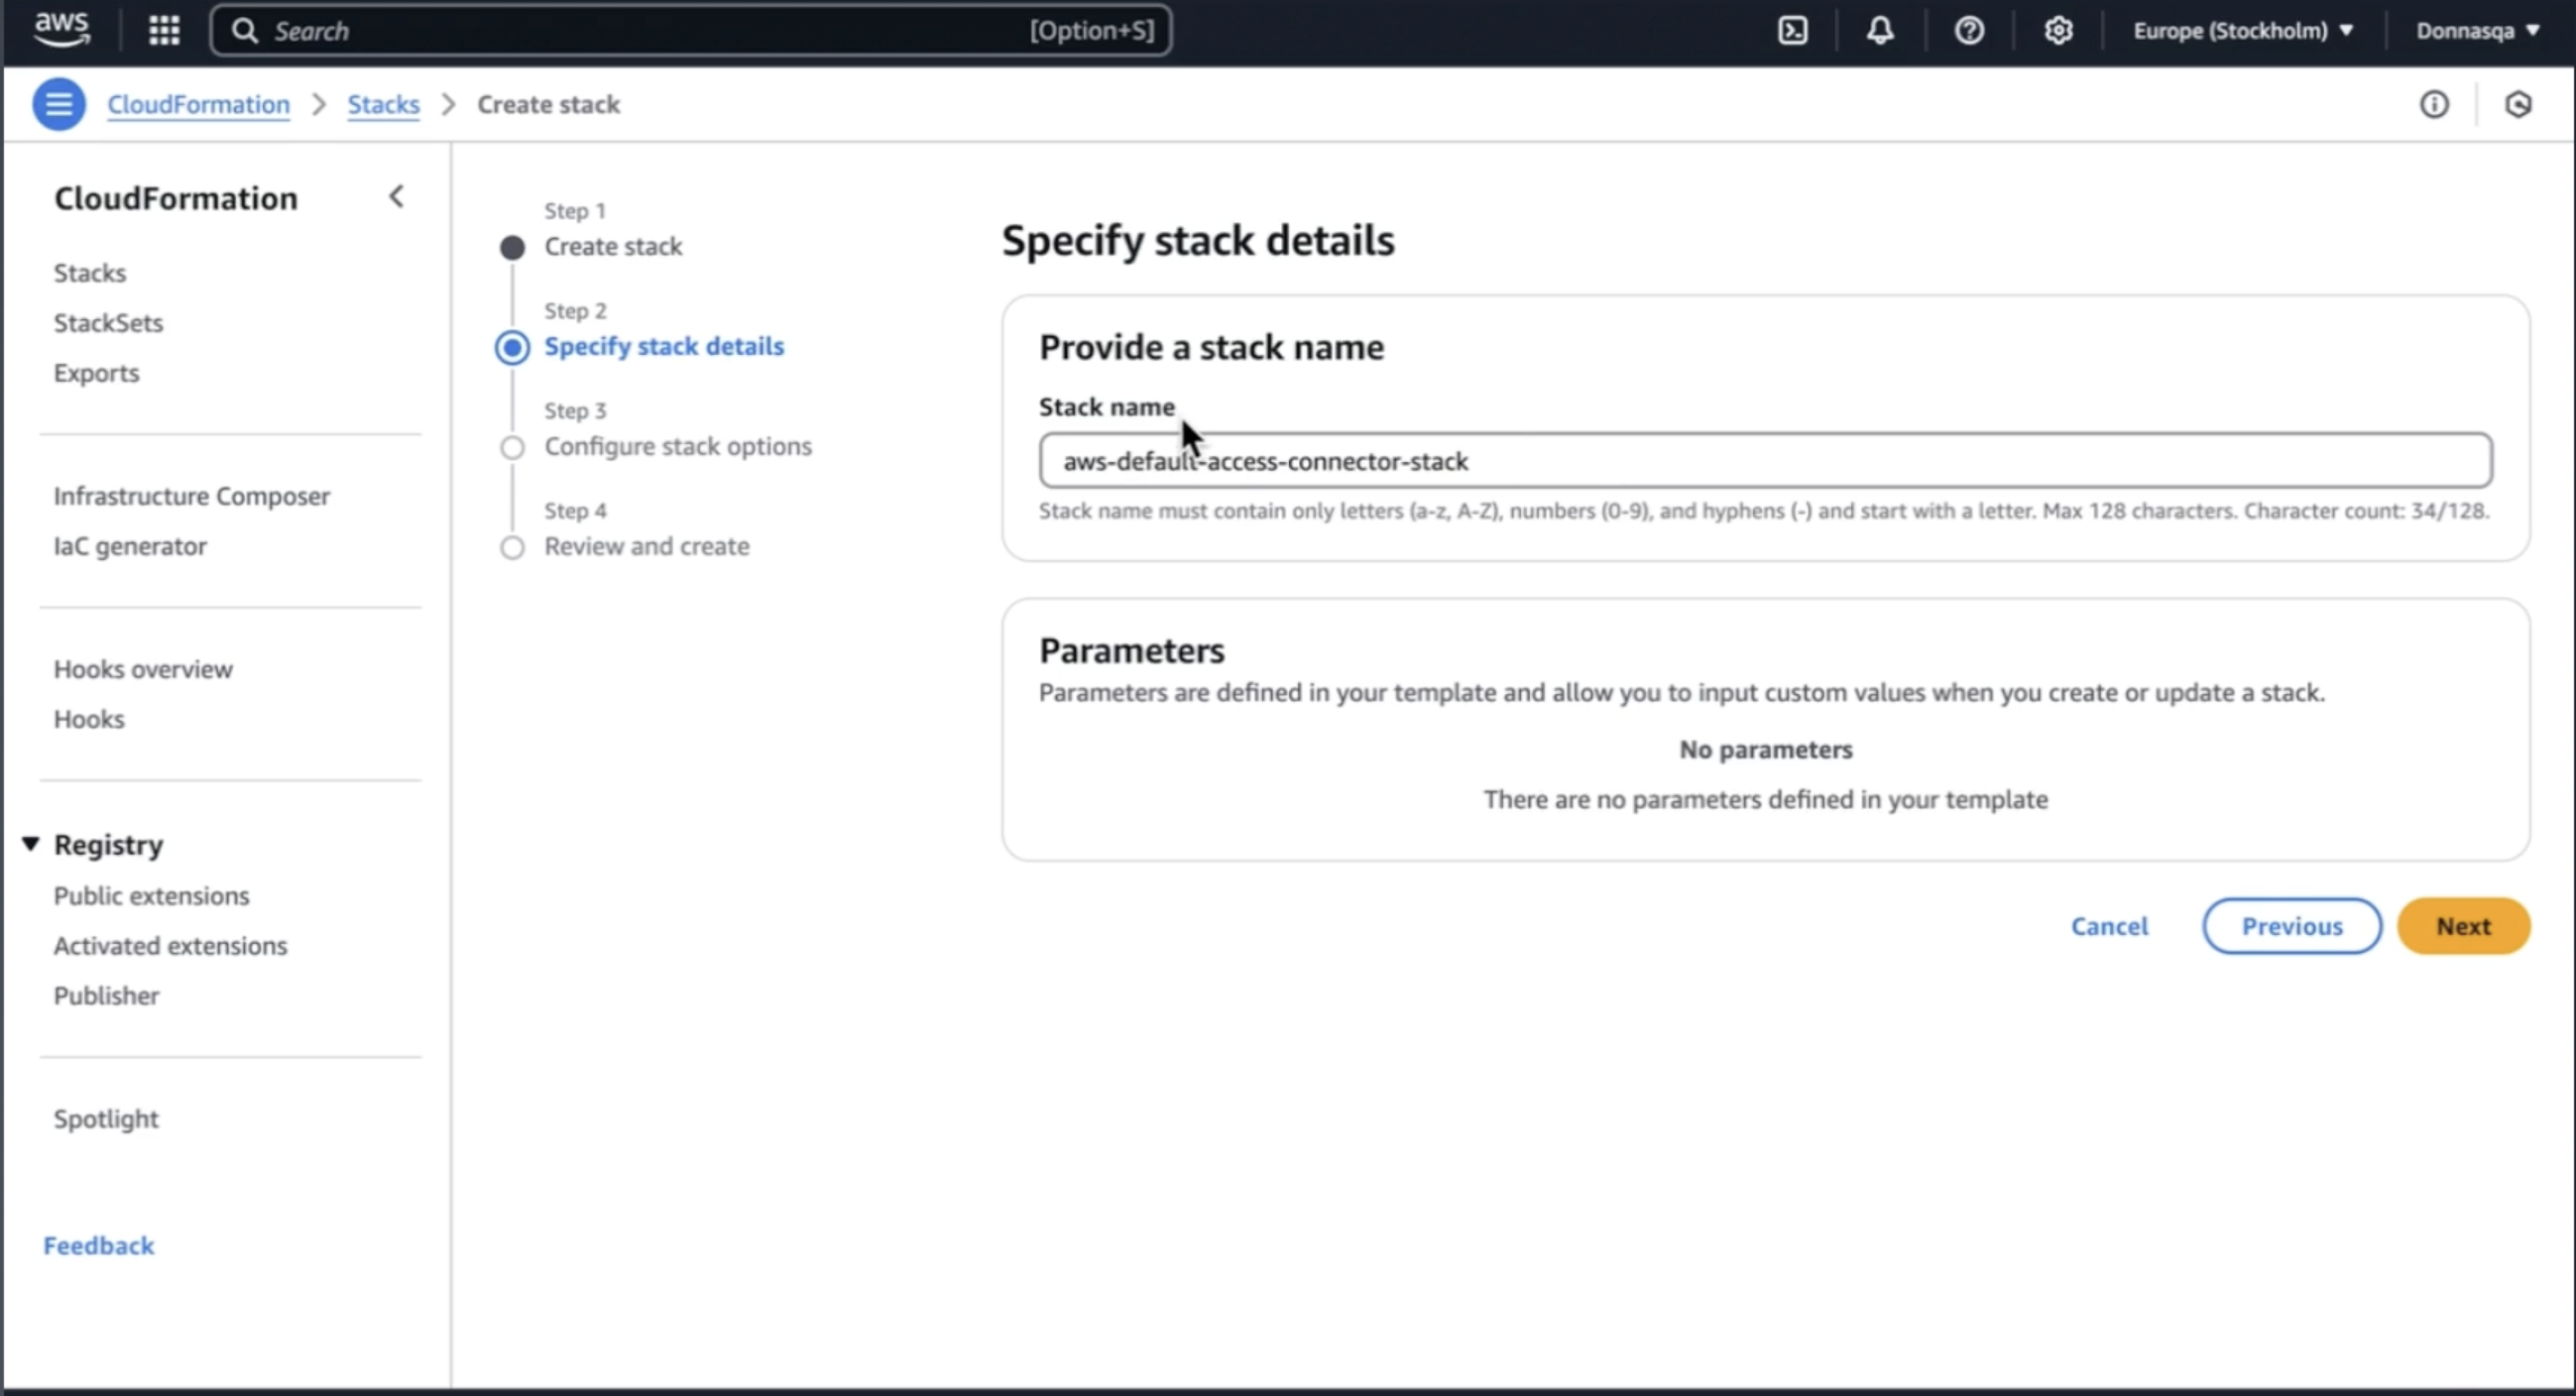
 8. Specify Stack Details > Stack name will be provided by default based on your connector name provided in step 4. Simply click "Next"
 9. Configure Stack Options(Optional Step)
10. Review all Configurations and click "Submit" to create the stack.
11. Monitor Stack Creation -The stack will begin deploying. Wait until the status changes to "CREATE\_COMPLETE"
9. Configure Stack Options(Optional Step)
10. Review all Configurations and click "Submit" to create the stack.
11. Monitor Stack Creation -The stack will begin deploying. Wait until the status changes to "CREATE\_COMPLETE"
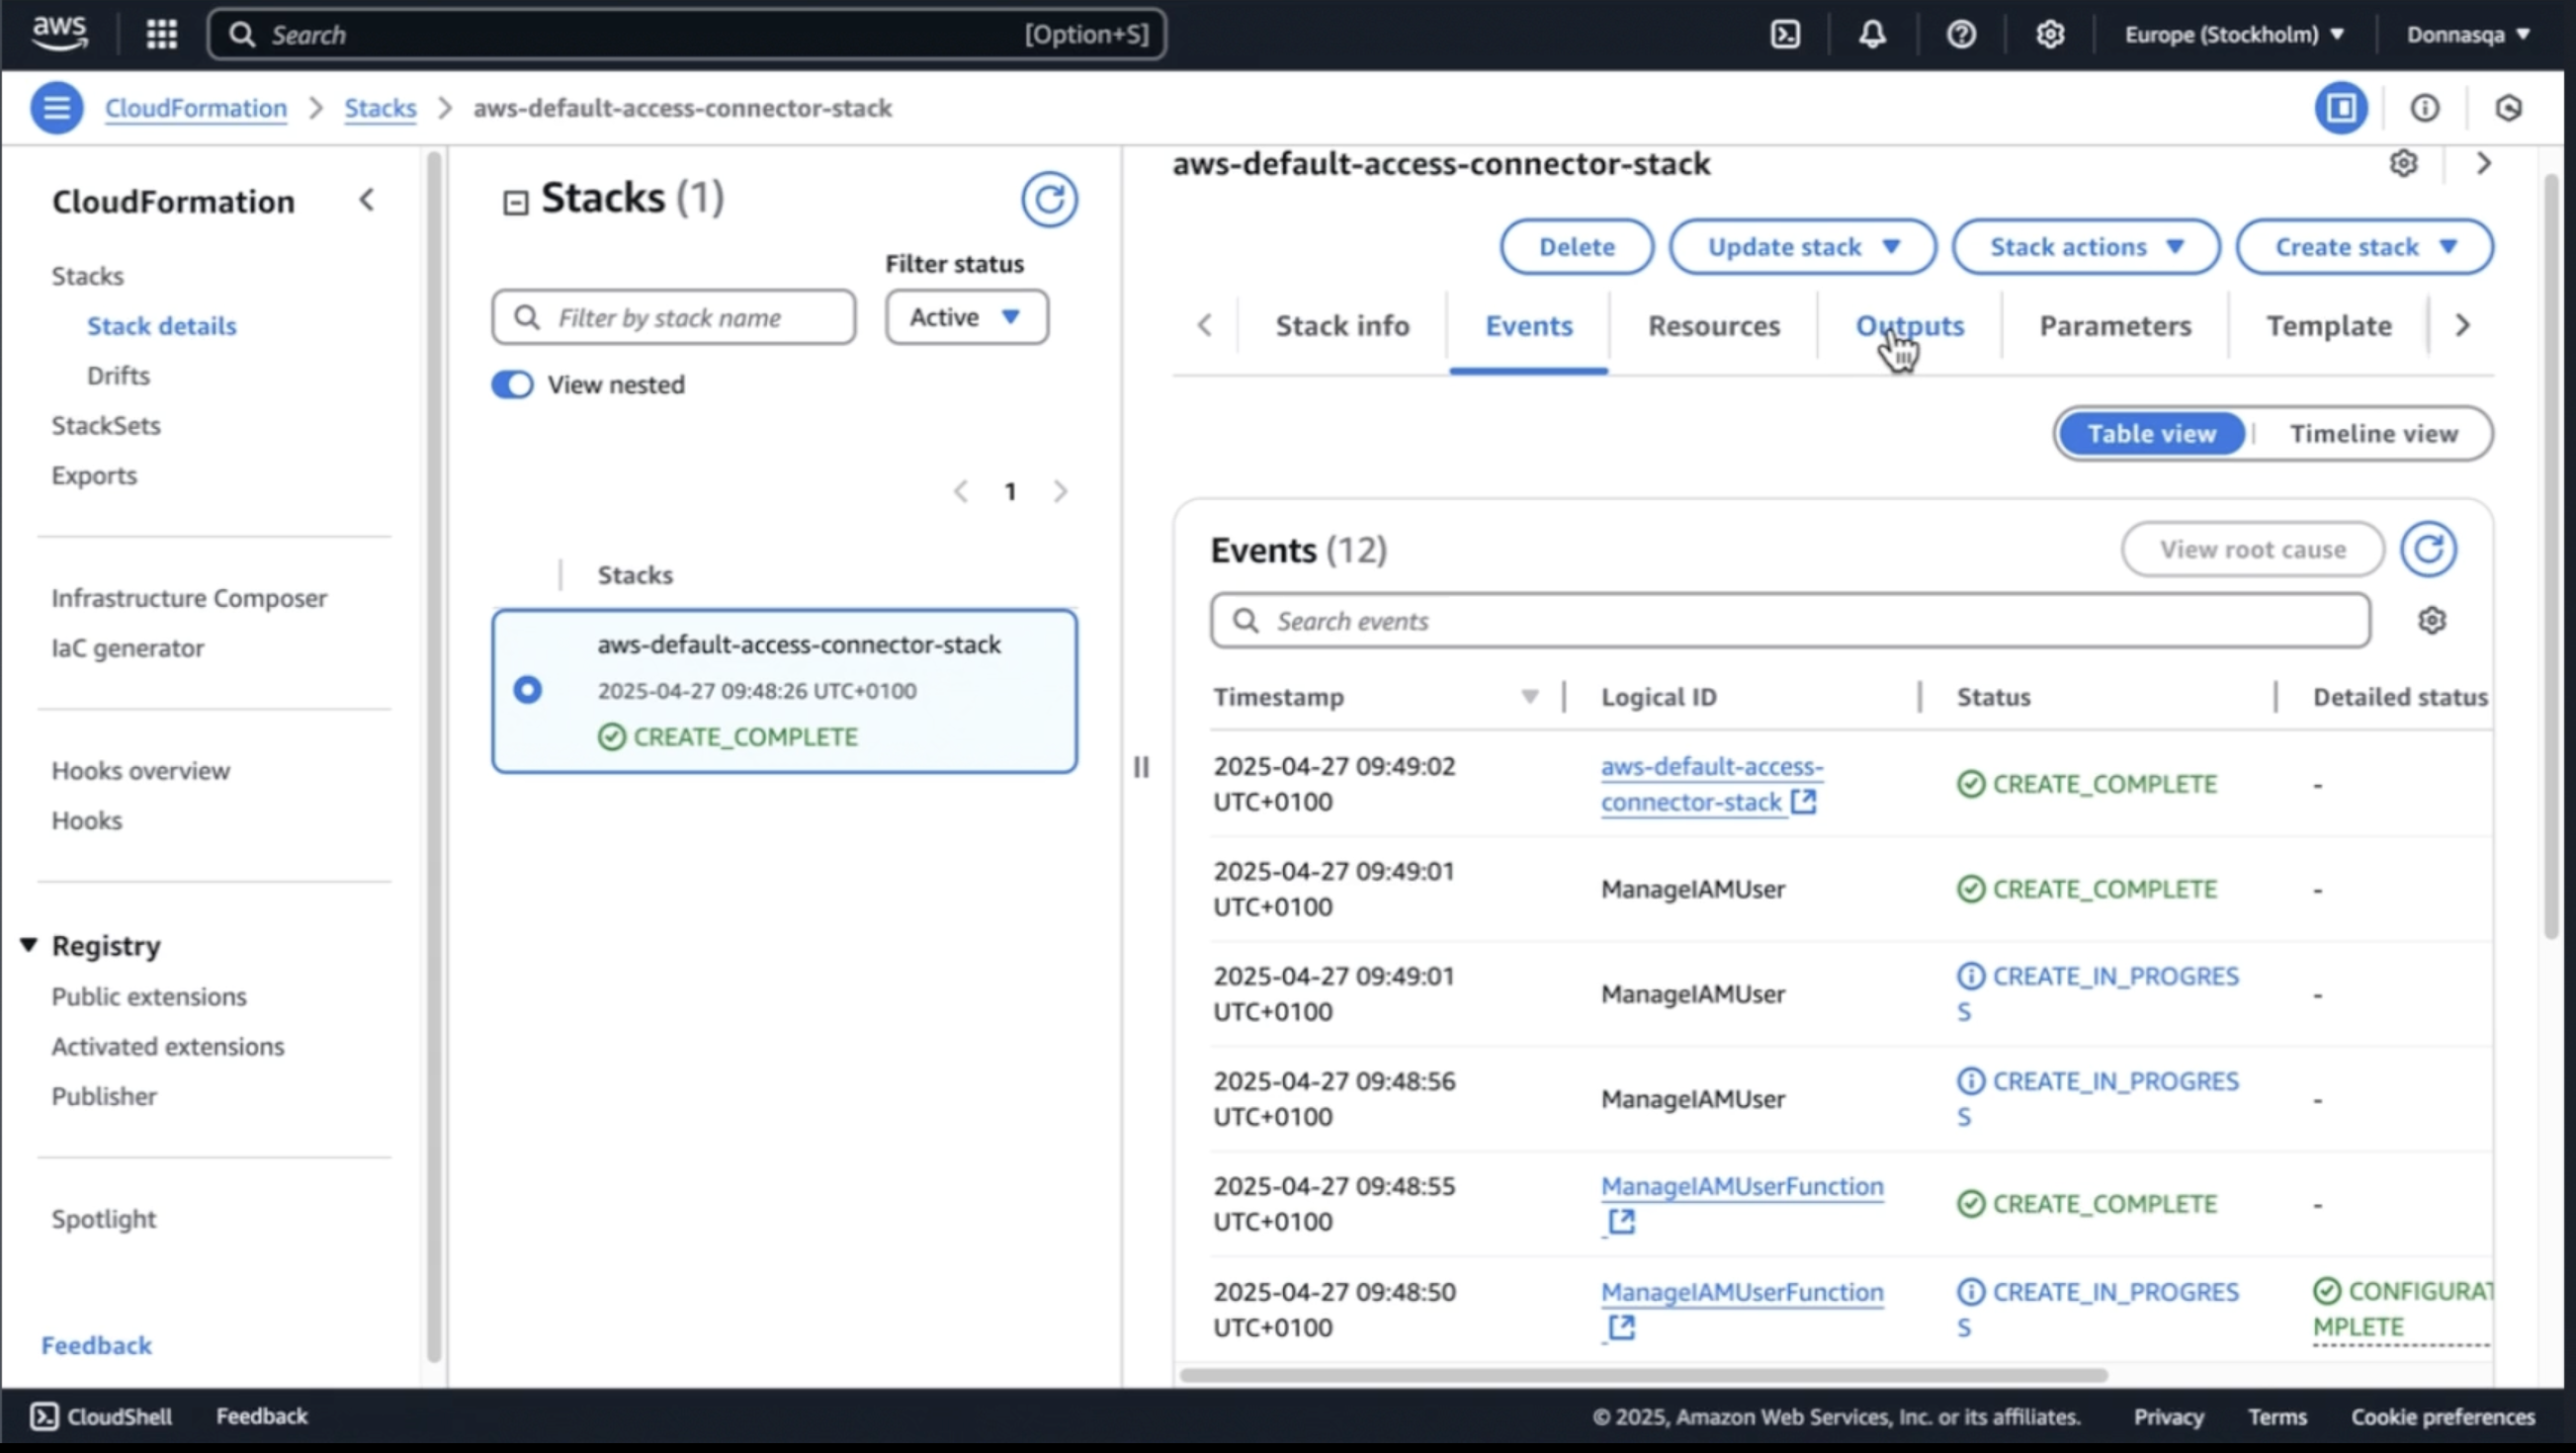 12. Click on "Outputs" tab when the stack status changes to "CREATE\_COMPLETE"
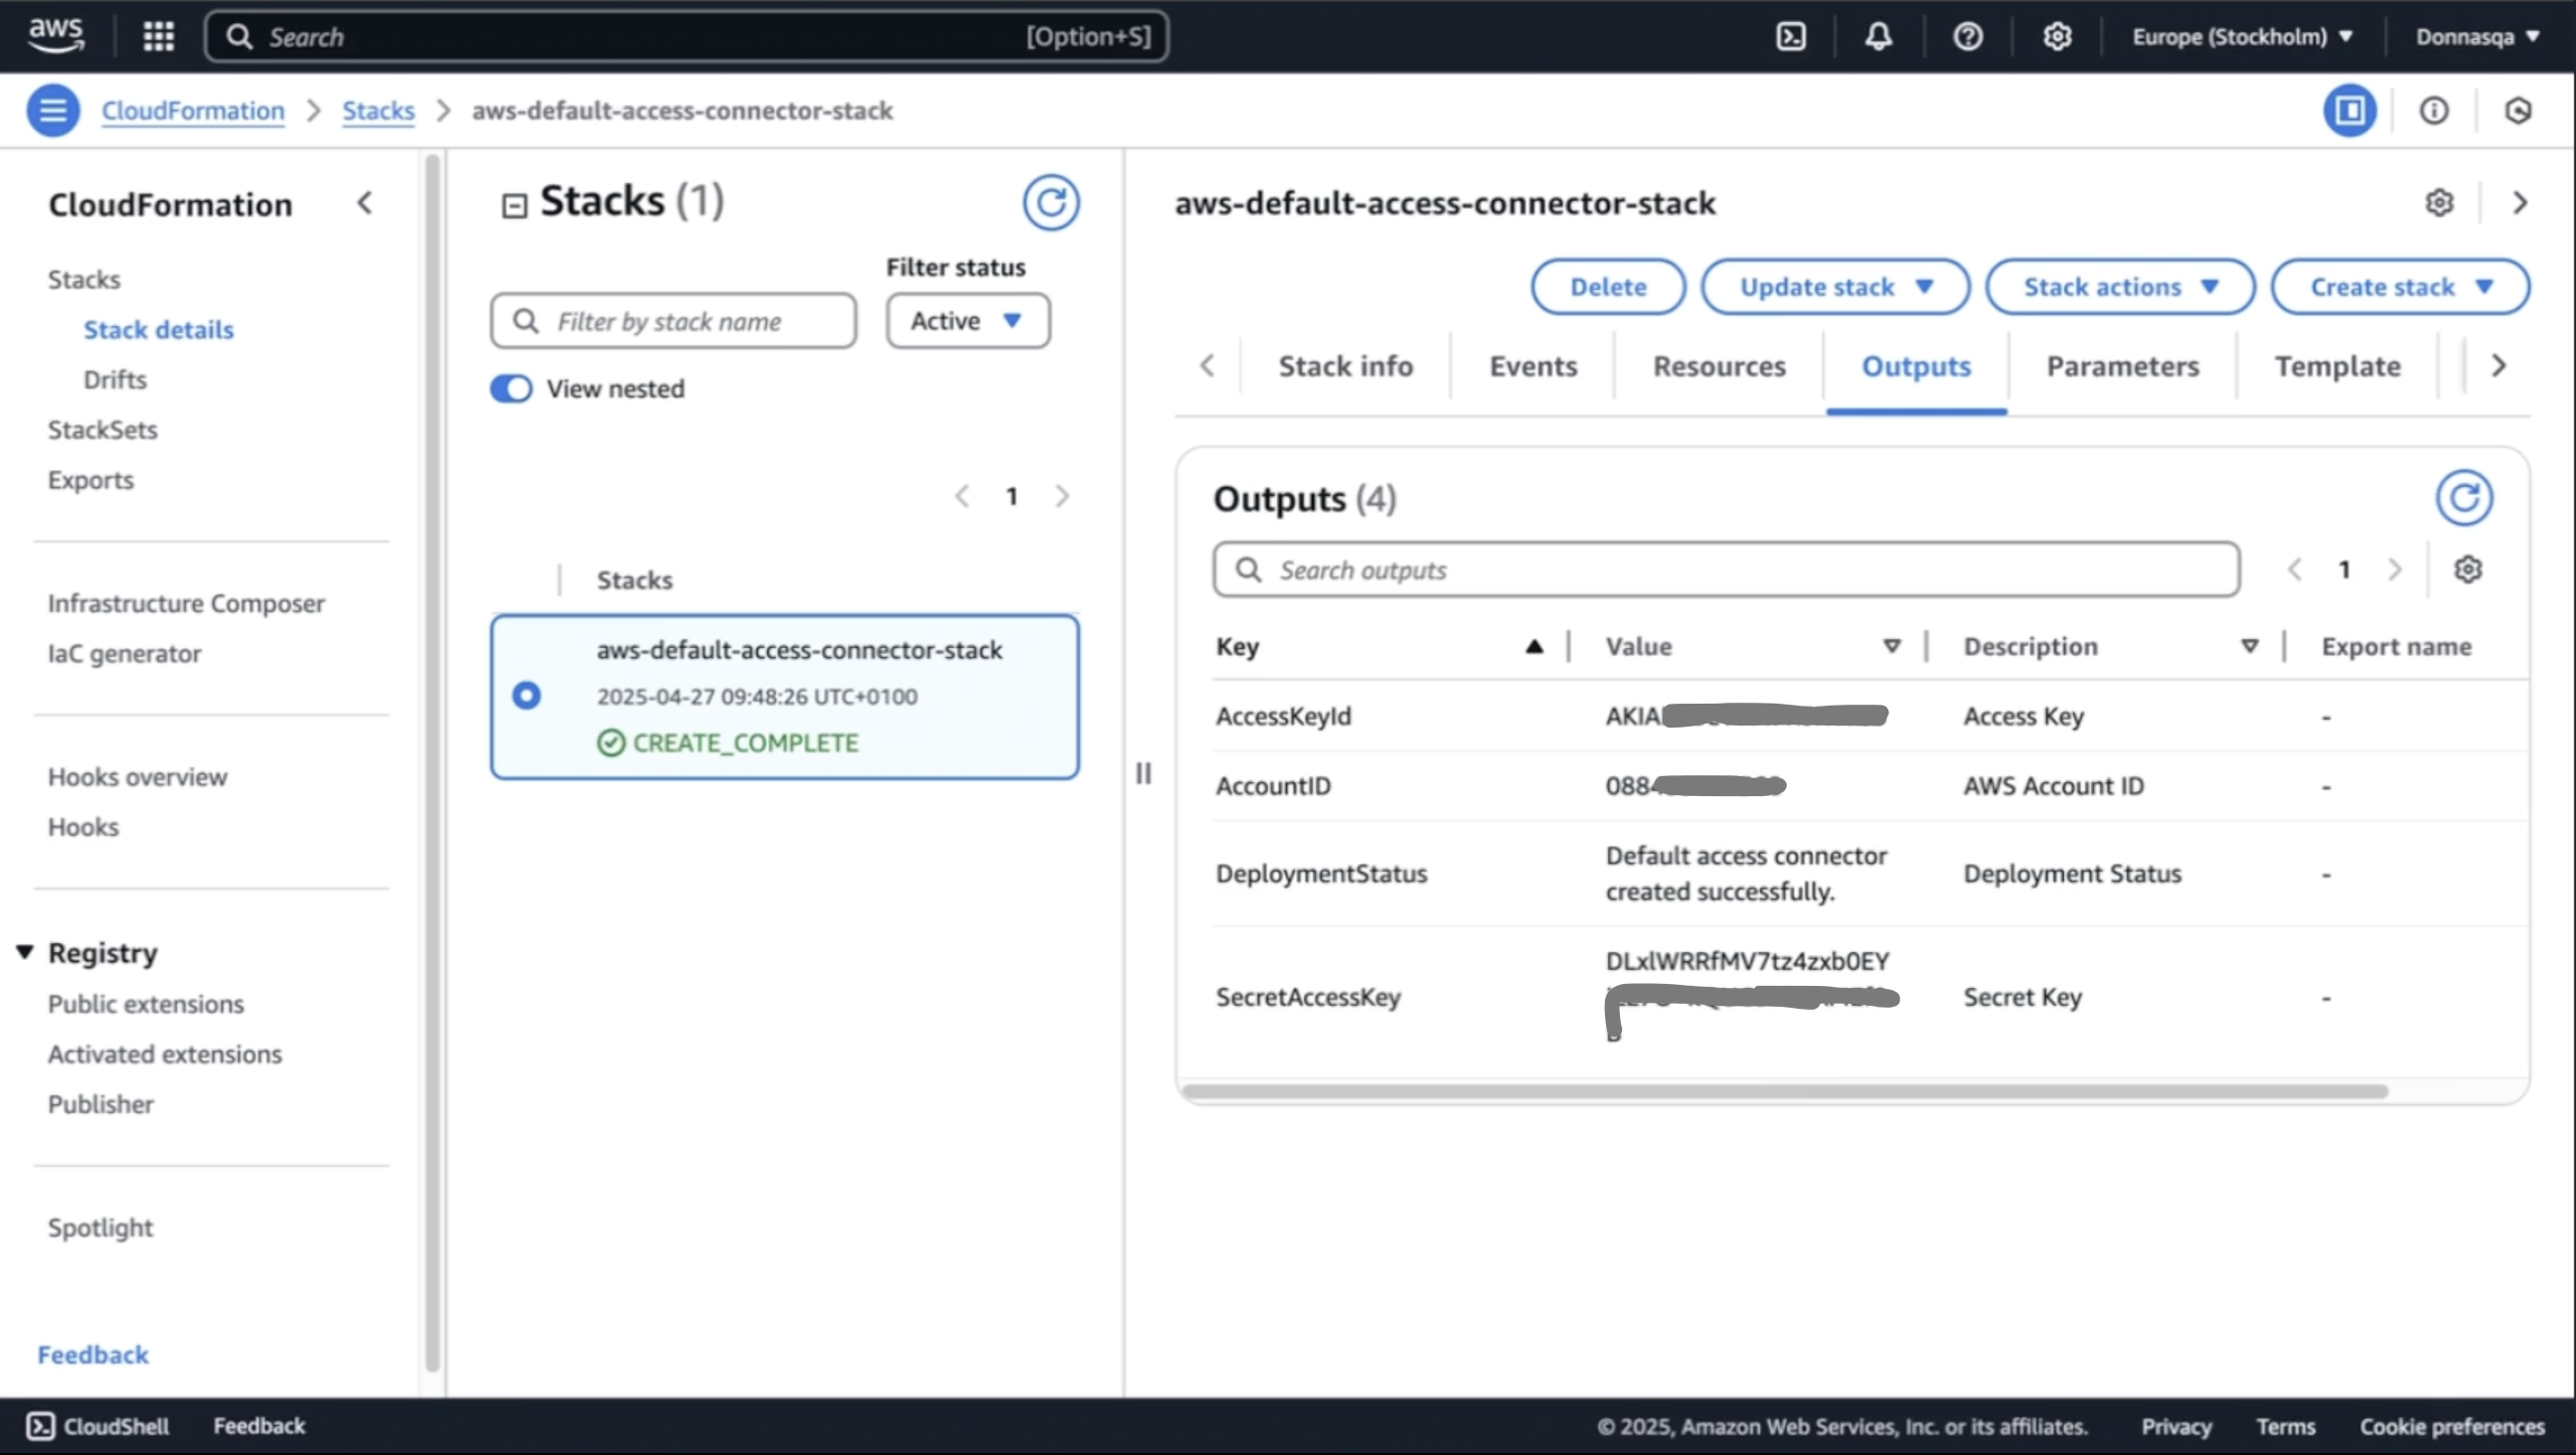
13. Retrieve the generated keys and store them securely:
📌 Access Key ID
📌 Secret Access Key
📌 AWS Account ID
12. Click on "Outputs" tab when the stack status changes to "CREATE\_COMPLETE"
13. Retrieve the generated keys and store them securely:
📌 Access Key ID
📌 Secret Access Key
📌 AWS Account ID
 13. You can now switch back to your Cloudsania tab opened to the left and continue the connector setup.
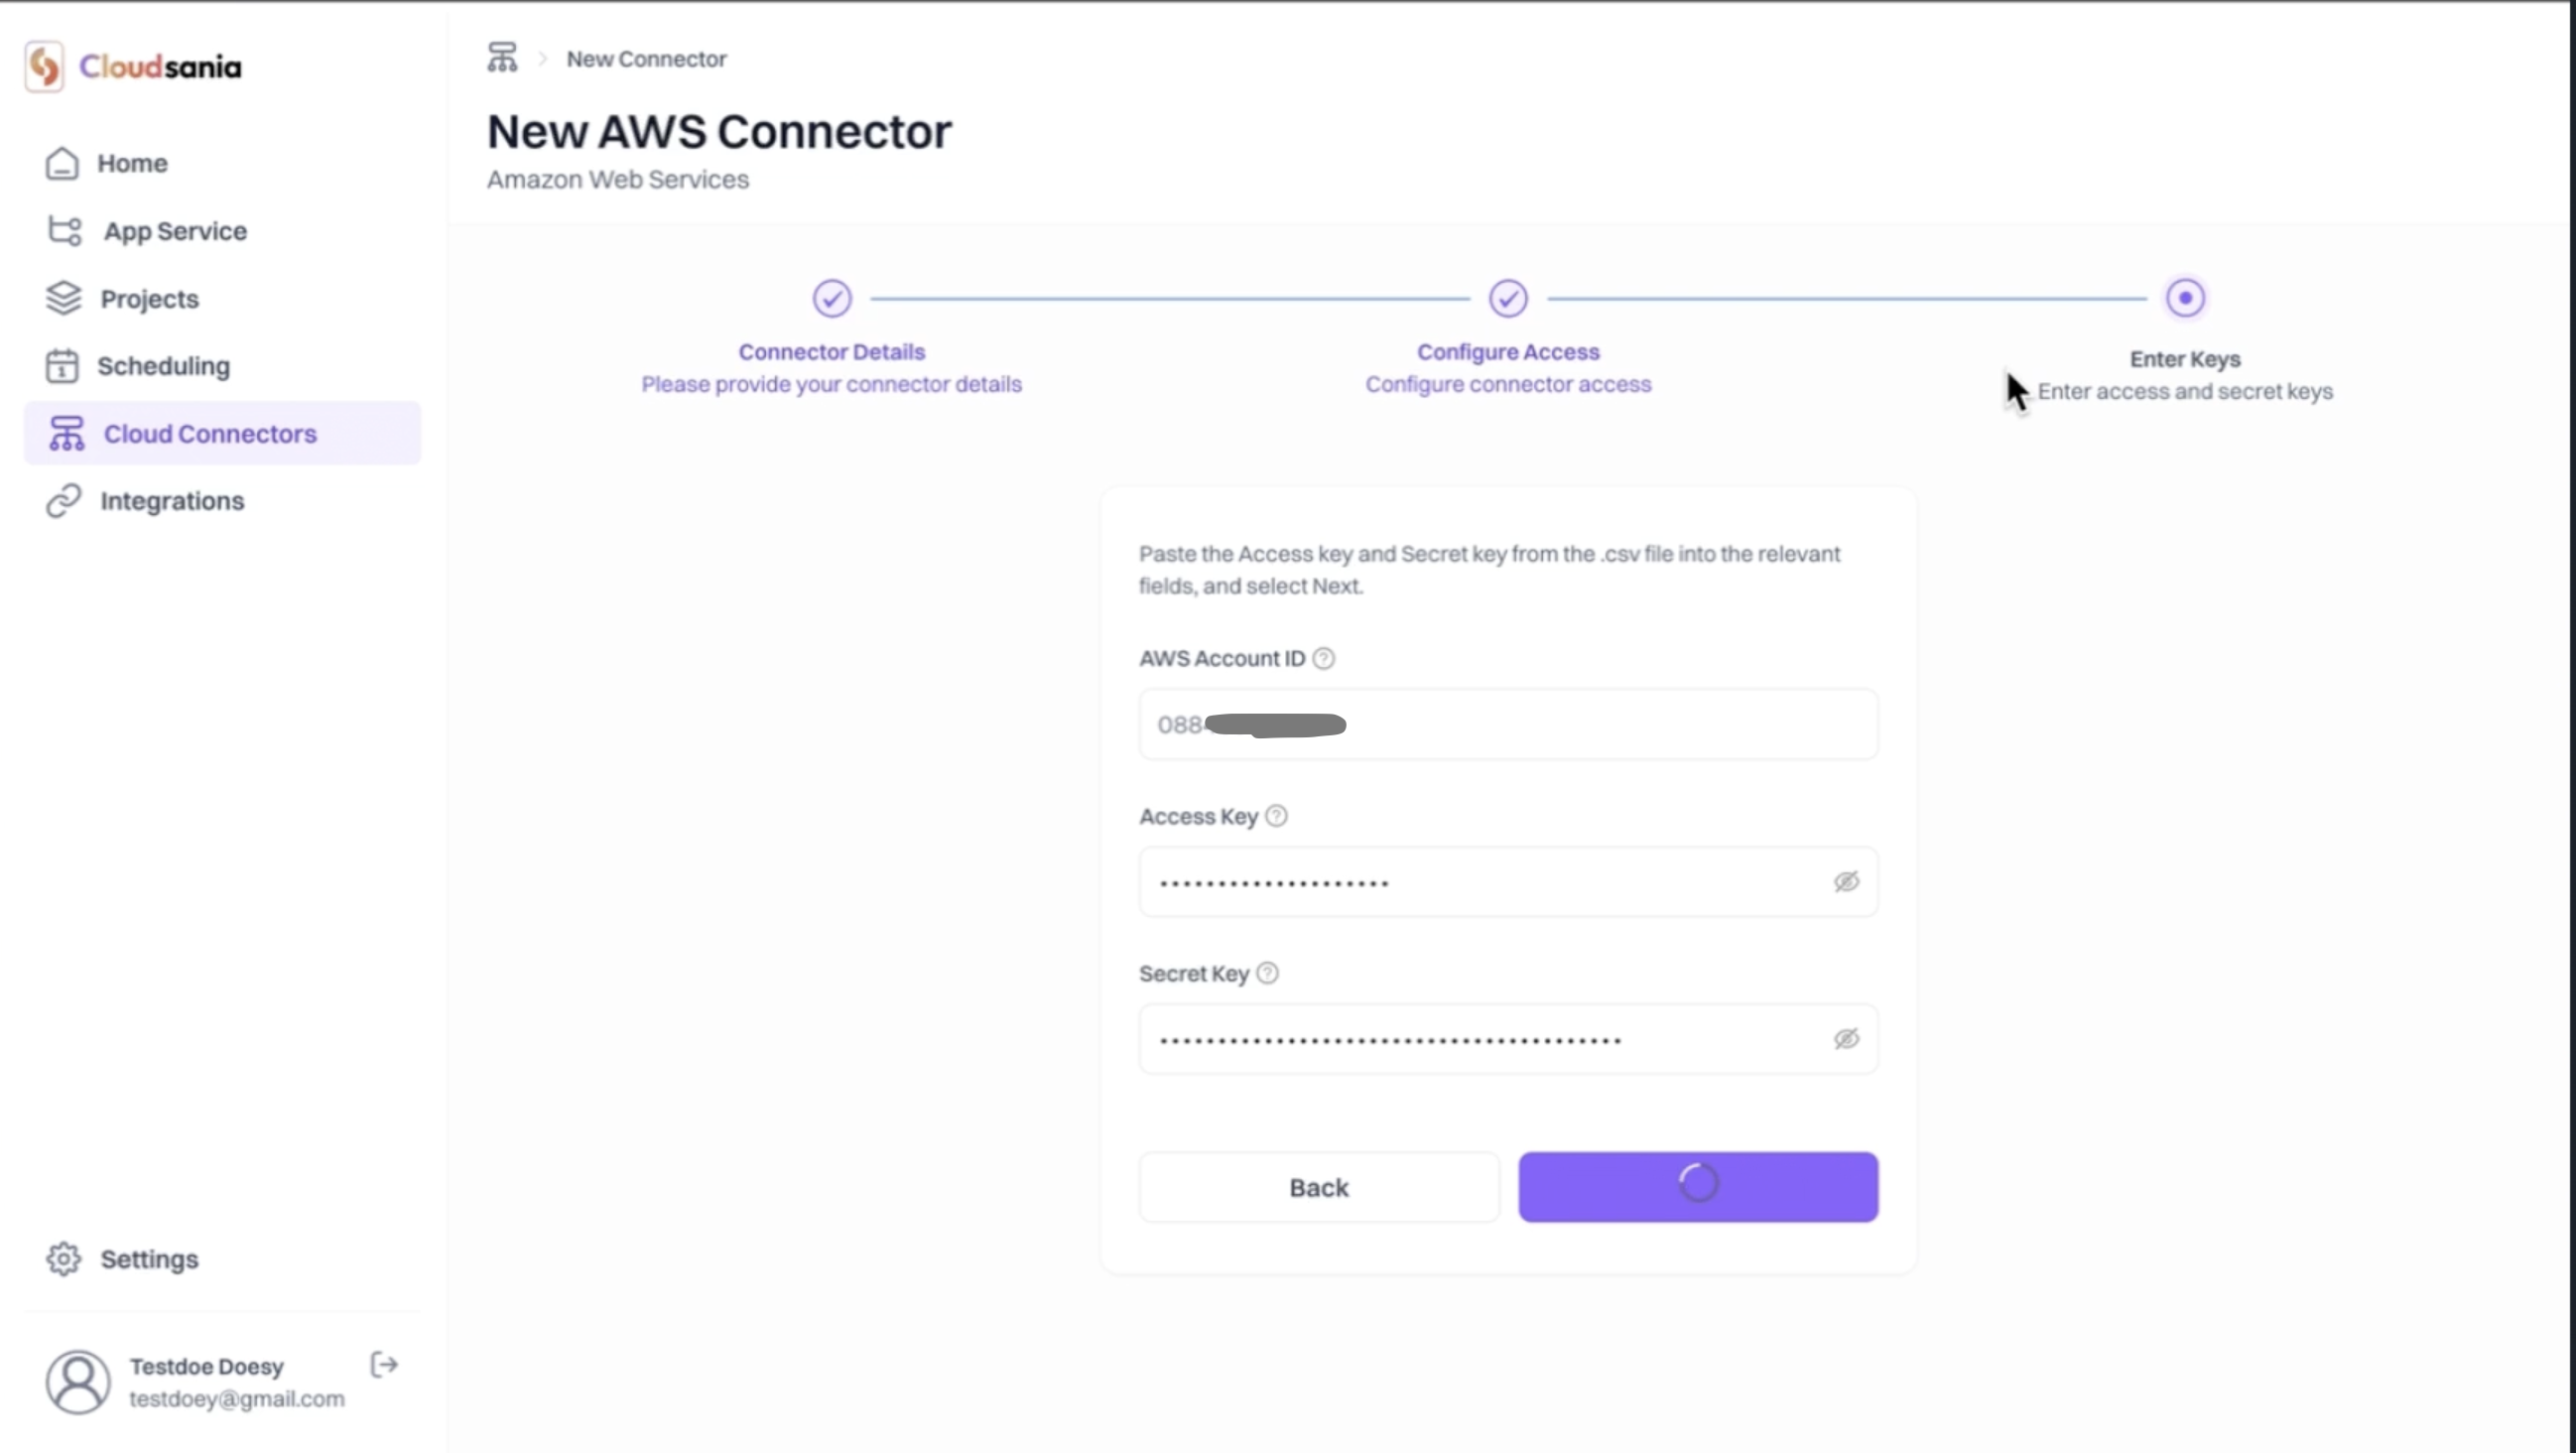
14. Proceed to Enter the Keys retrieved in the stack output.
* Enter your "AWS Account ID", "Access Key", and "Secret Key" in the relevant fields
* Click on the "Create" button
13. You can now switch back to your Cloudsania tab opened to the left and continue the connector setup.
14. Proceed to Enter the Keys retrieved in the stack output.
* Enter your "AWS Account ID", "Access Key", and "Secret Key" in the relevant fields
* Click on the "Create" button
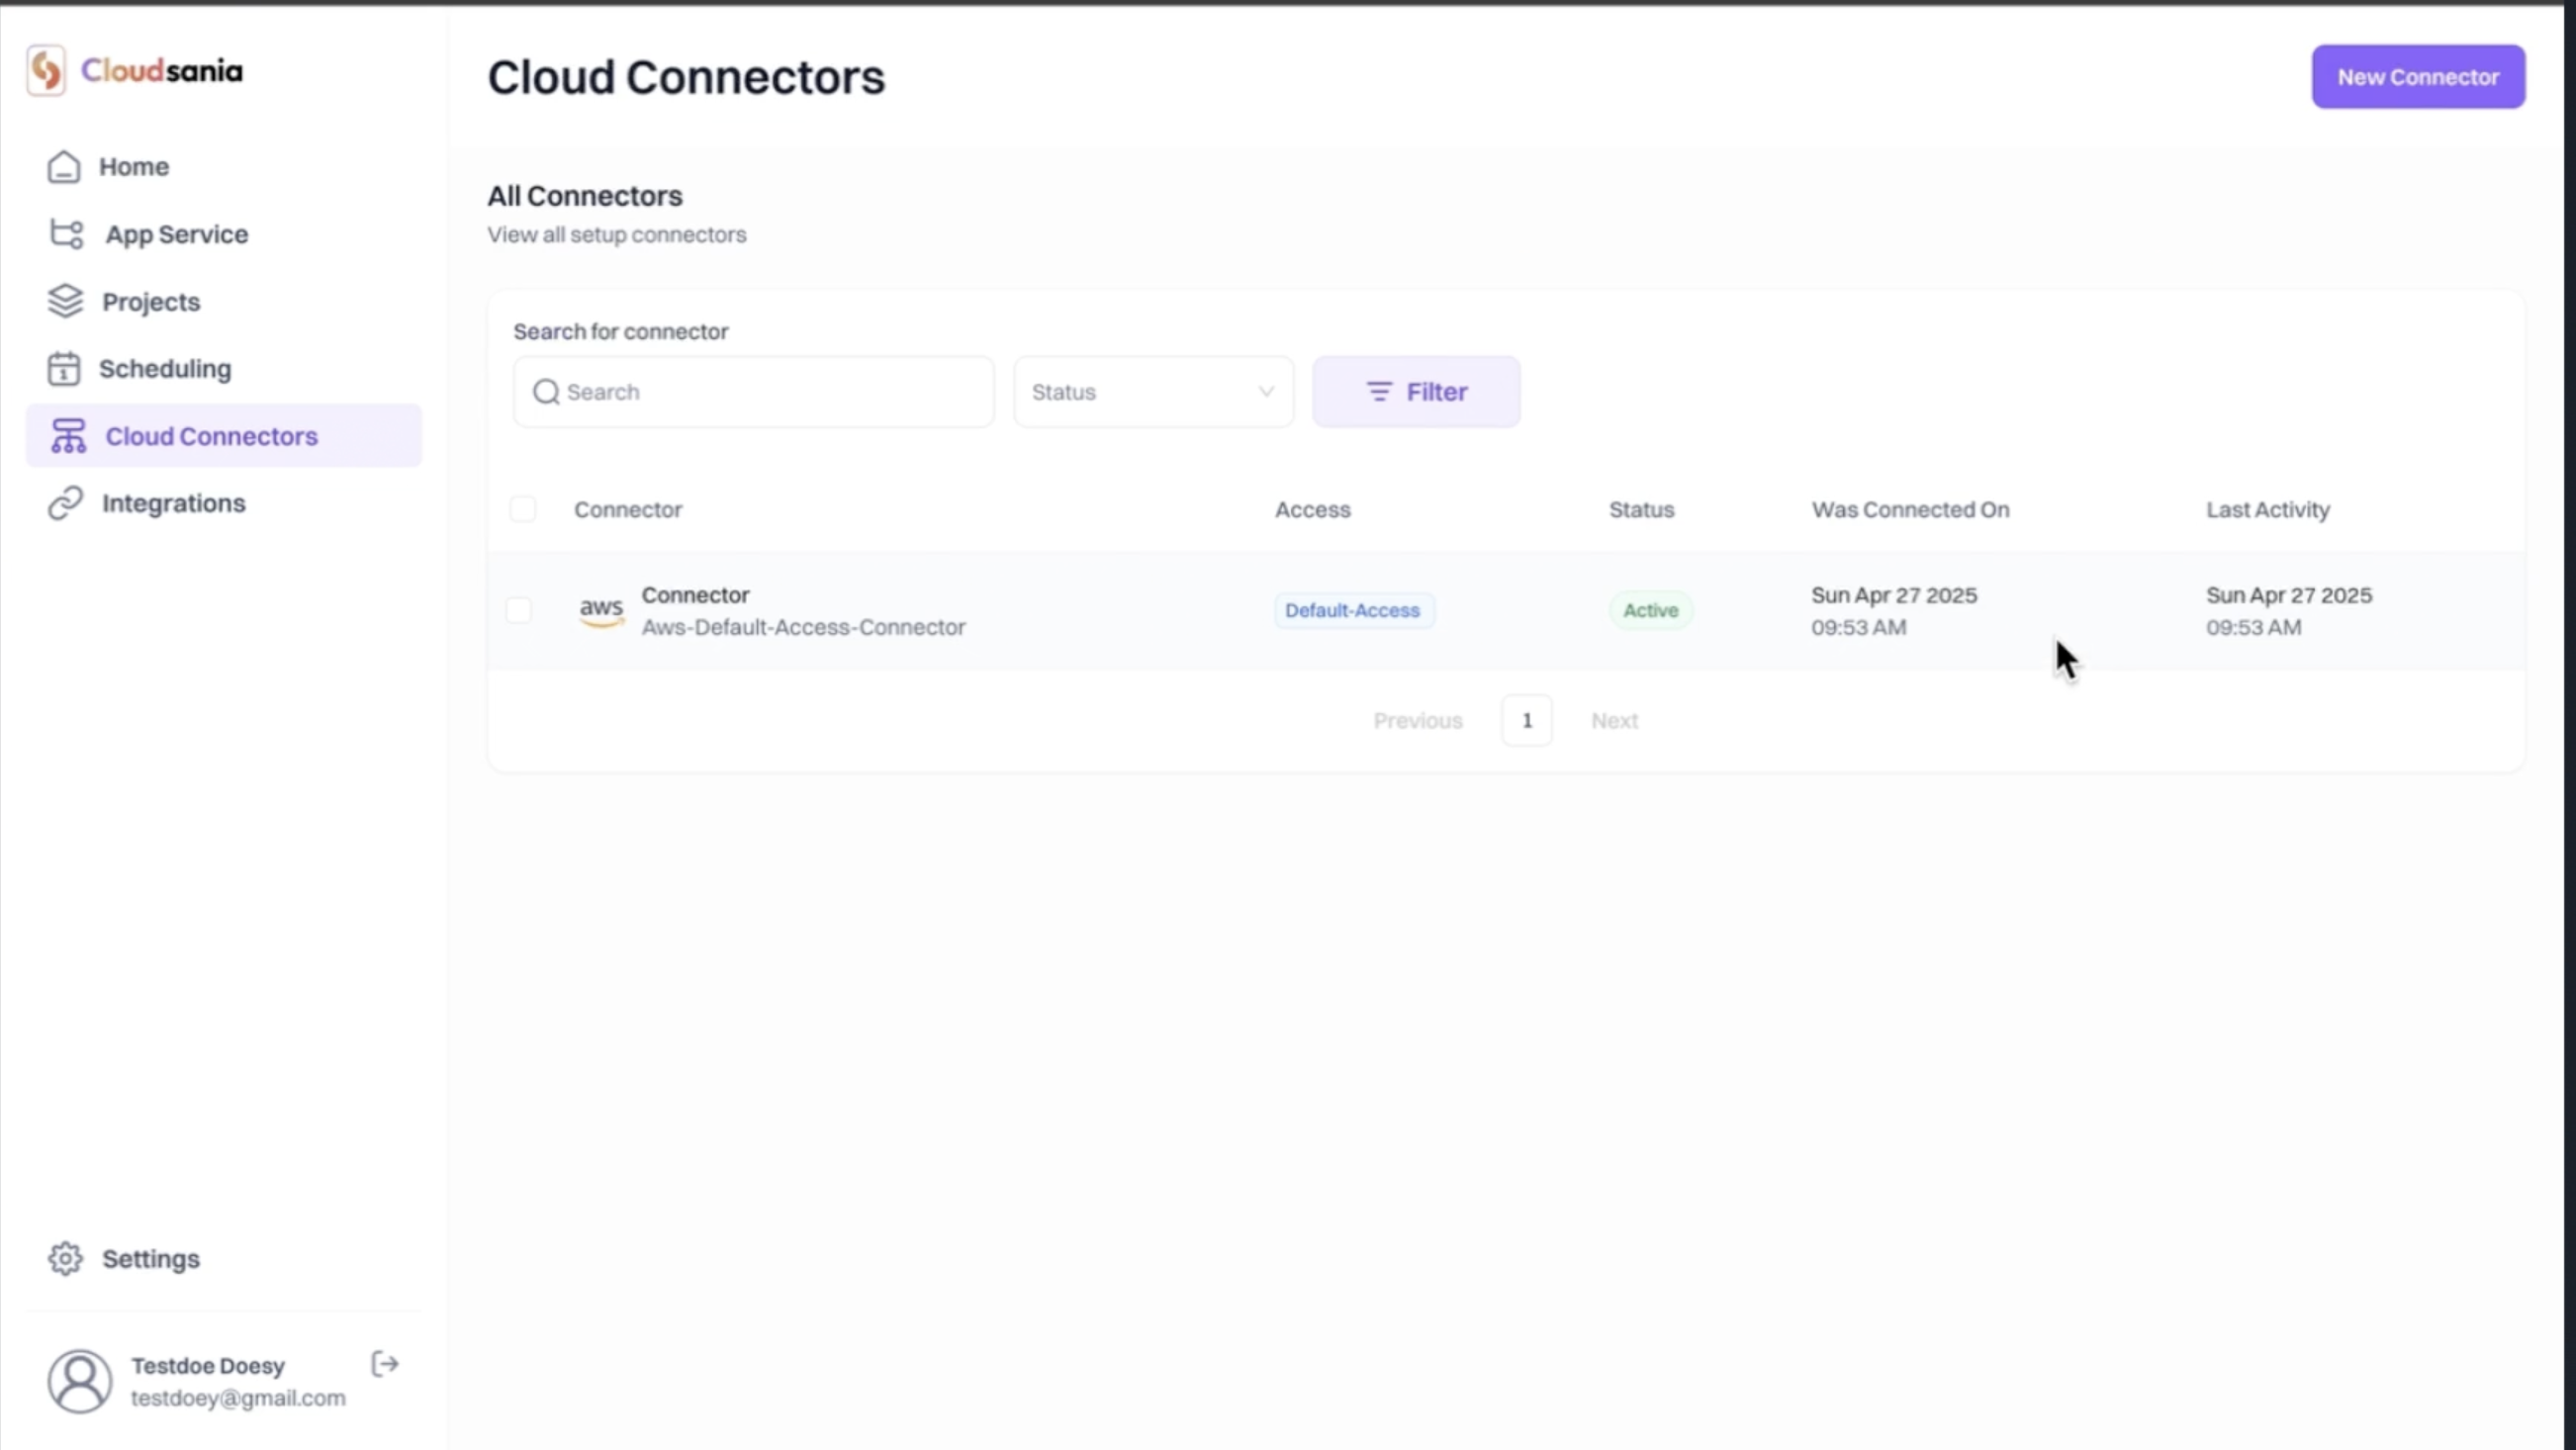
 14. Upon successful creation, your AWS default access connector will now appear on the "Cloud Connectors" page and the status marked as "Active"
 ## Next Steps
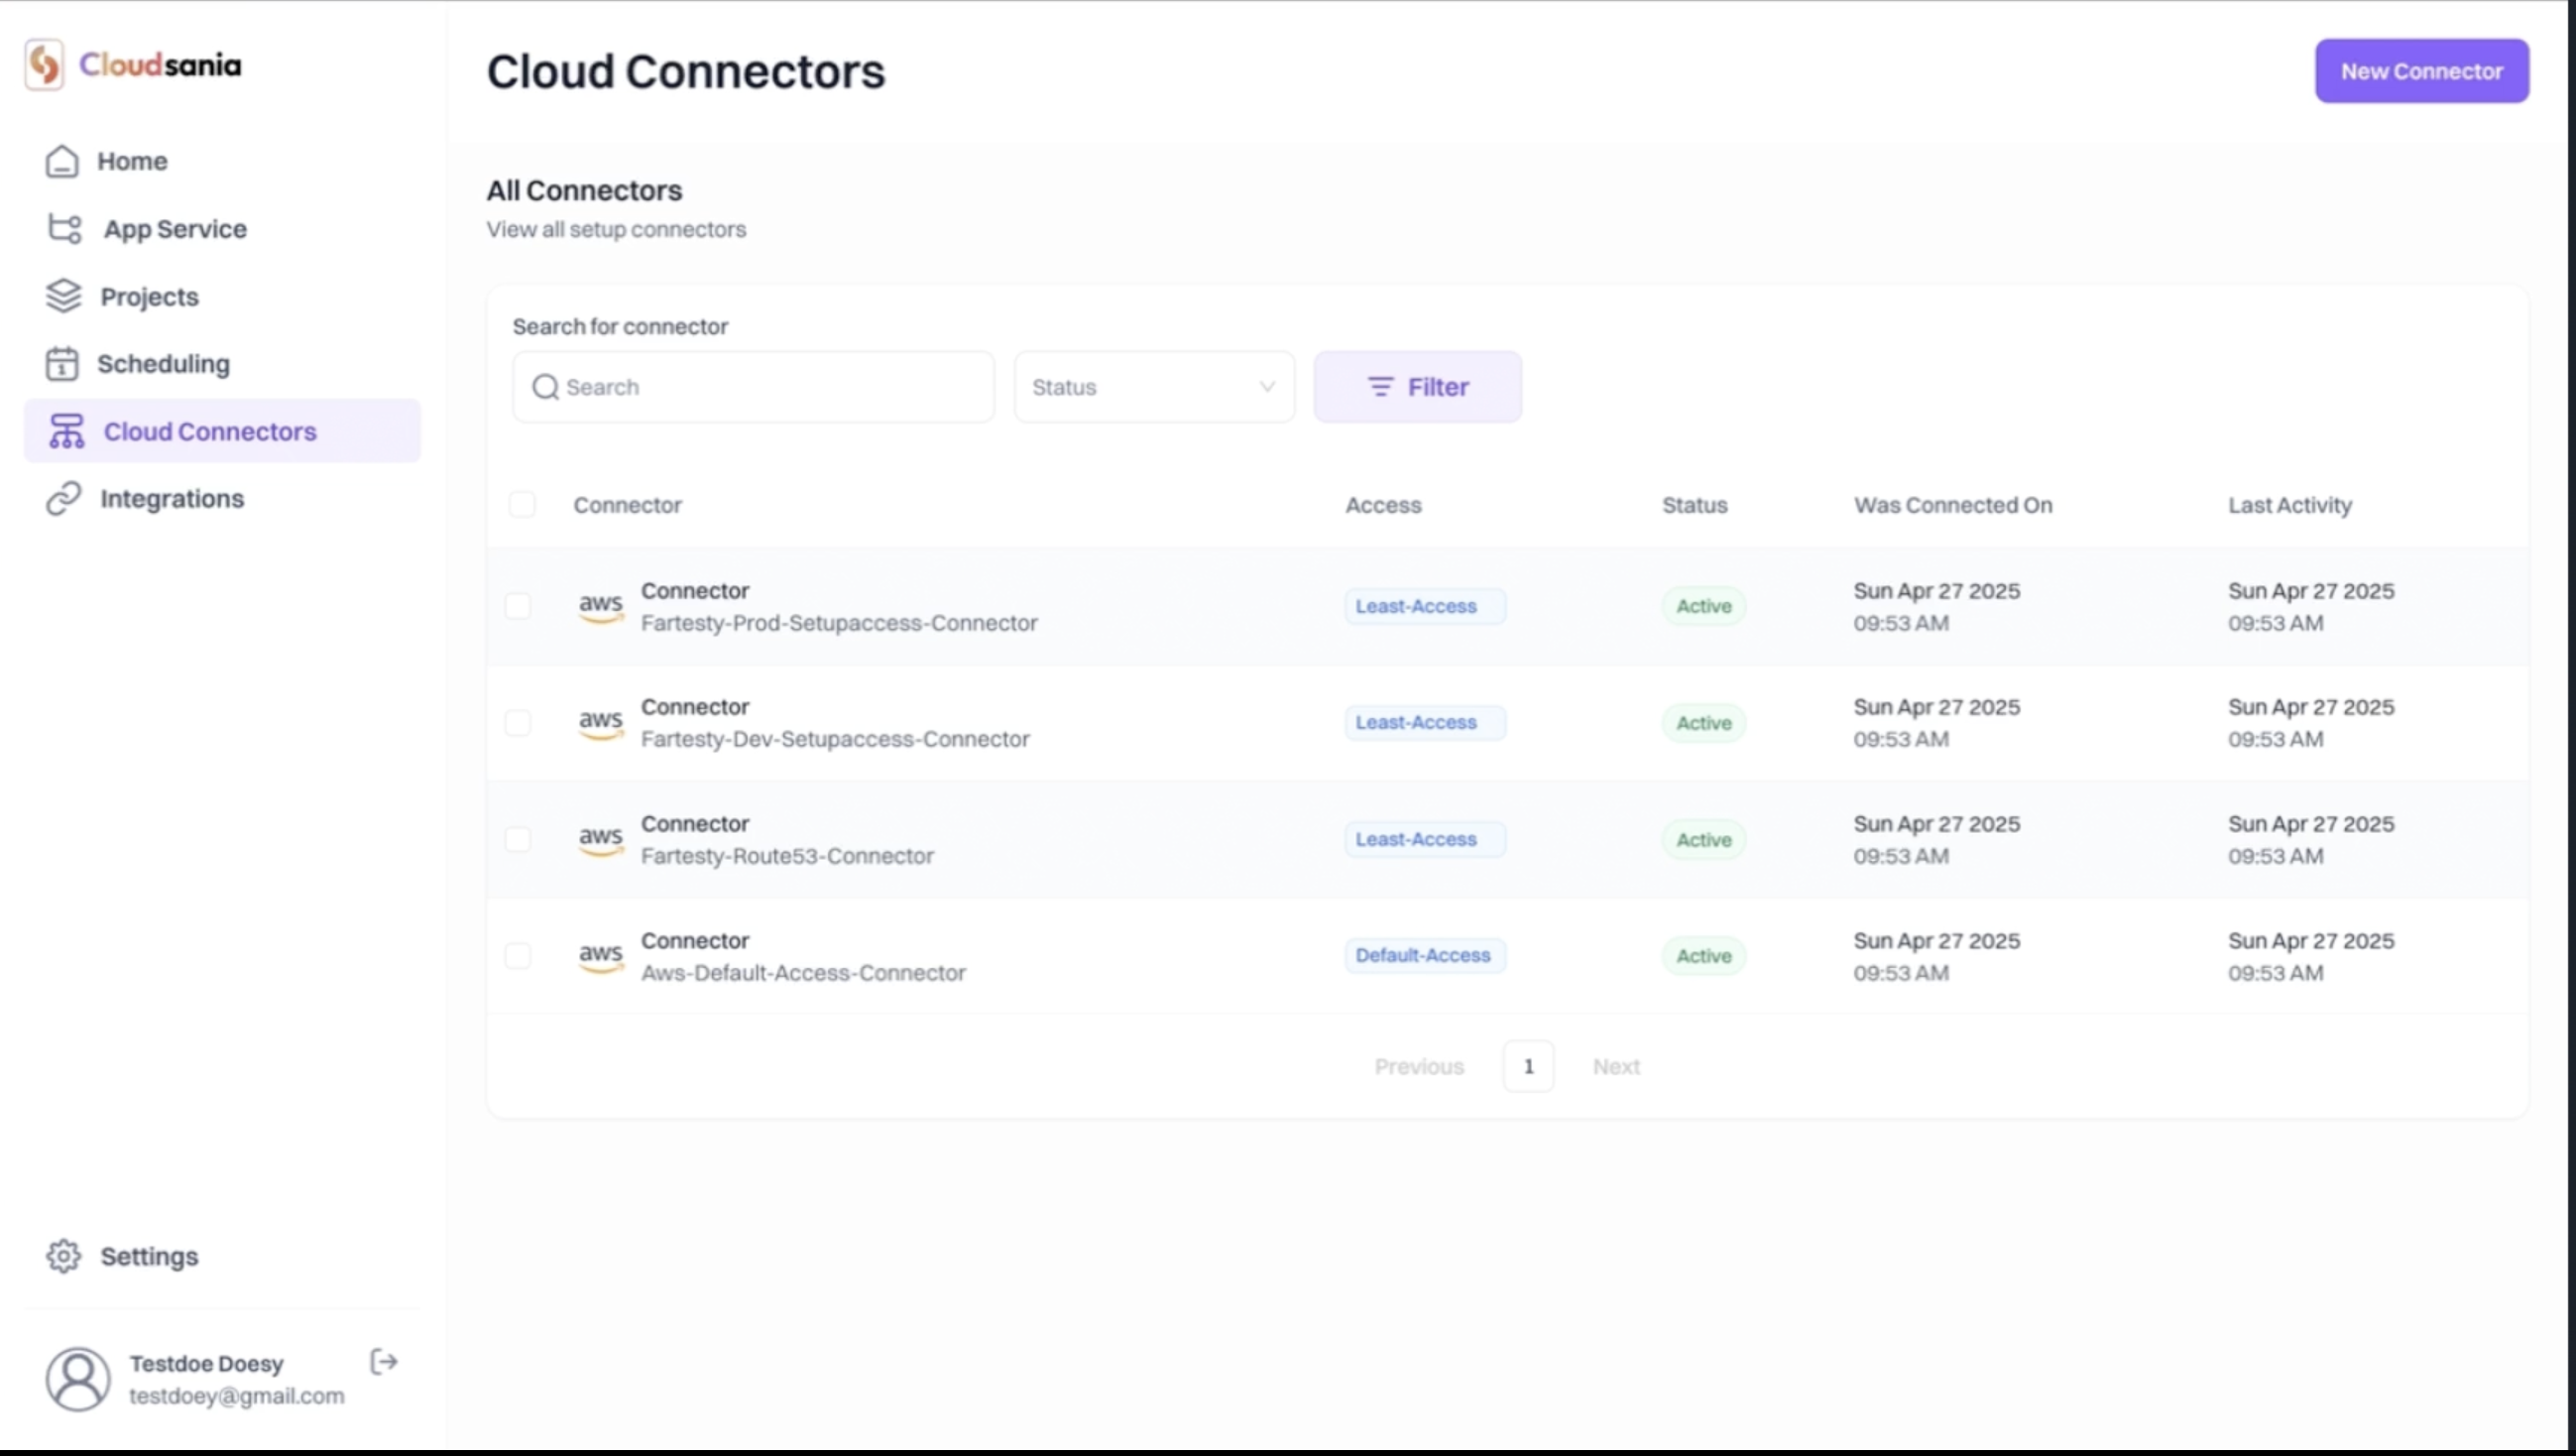
✅ Verify the creation of your "Setupaccess-Connector" on the "Cloud Connectors" page.
Wait for fews seconds and you'll see the the create Setupaccess-Connectors.
## Next Steps
✅ Verify the creation of your "Setupaccess-Connector" on the "Cloud Connectors" page.
Wait for fews seconds and you'll see the the create Setupaccess-Connectors.
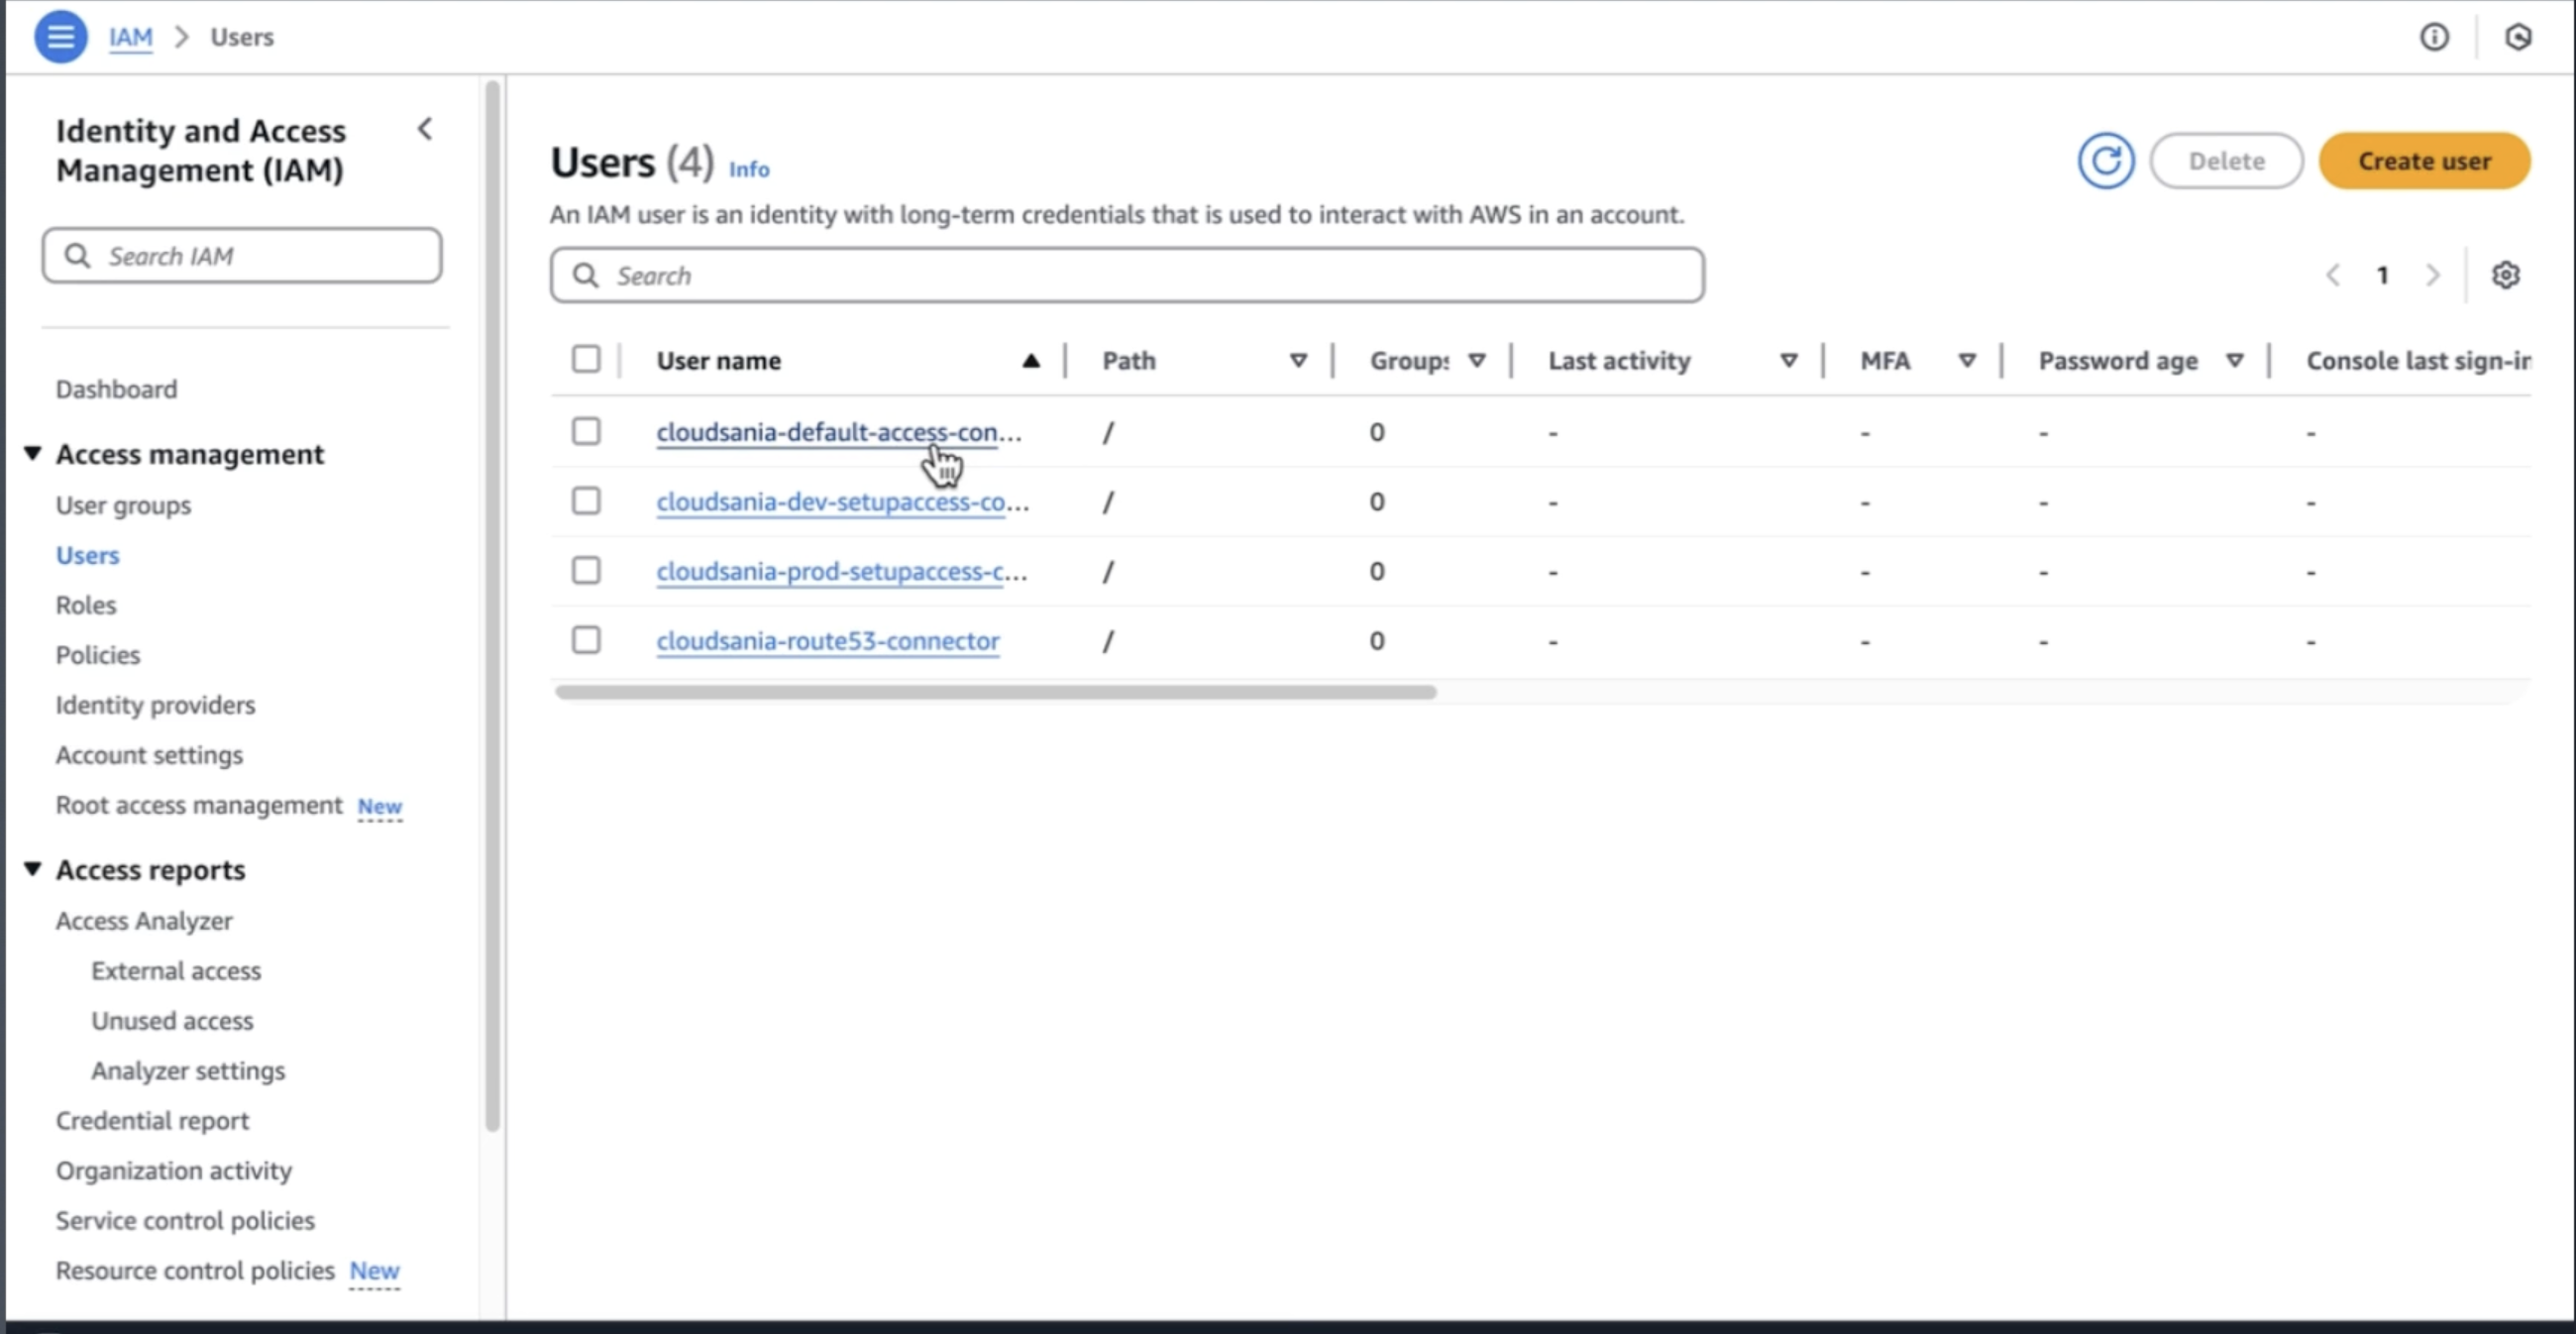
 ✅ Verify the creation of the corresponding IAM users on your AWS account
 Your AWS Connector is now successfully configured and ready for use! 🎉